With Google Workspace, companies can have a great set of apps to run their workflow and also the opportunity to have their own domain. No wonder it has been used for more than 10 million businesses around the world.
On this article you are going to learn how to set up Google Workspace the proper way, so you can finally have all its benefits at work. But before, we need to introduce you to some essential decisions you need to take before setting your account.
Before signing up to Google Workspace
It’s important to be prepared with some fundamental elements you are going to need to sign in to your new account.
The first thing you need to consider is your domain. The domain is necessary for creating your business email. So, do you already have one? Do you need to buy one, or just use a free domain? Also, is the name already taken? Plan all these things before starting your account so the process of signing up can be quicker.
An important thing you need to know before setting up your Google Workspace account is that you will receive a 14-day free trial to test it, and then decide if you want to pay for it. That’s why you need to have a valid credit card to conclude the creation of your new account.
Google Workspace prices and plans
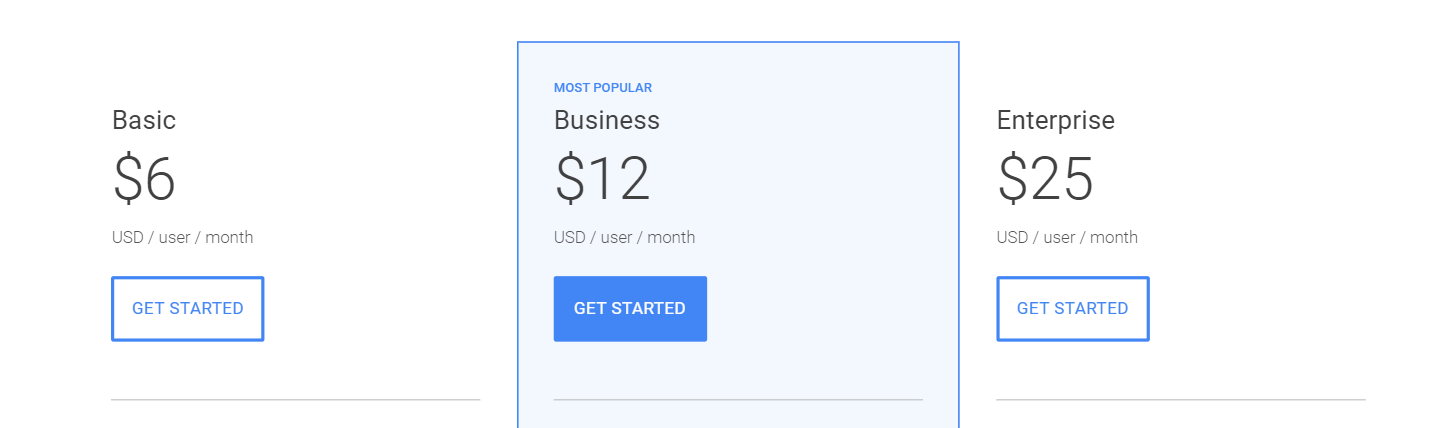
Google Workspace offers three distinct plans: Basic, Business and Enterprise. Before setting your account you should consider their differences, to decide which one of them is better for your company, with the adequate prices and features.
Let’s compare all the three plans, their prices, and some of their aspects to help you to find the one that fits all your needs.
Google Workspace Basic
The basic plan of Google Workspace is ideal for small and medium companies, and even being basic it offers a great set of features. For starters you can have access to the Office suite of Google (Docs, Sheets, Presentations), and each one of the users on your Google Workspace account have 30 GB of storage in Google Drive.
Besides that, Hangouts is also available, both for chat, or meeting. Hangouts chat is located inside your Gmail inbox, where your team can talk in real-time. Hangouts Meet is the place for voice and video conferences, for remote meetings. In this Basic plan you can set up meetings with up to 100 participants, simultaneously per call.
You also have access to shared calendars on Google Calendar to help your company set and keep up with important dates and events.
The price for Google Workspace Basic is $6/user/month.
Google Workspace Business
The Business plan was designed for medium to large companies or teams. But, depending on how your workflow is, even if you are part of a small company it can be a plan for you.
It has the same things that the basic plan, but some of them are improved, and new ones are added. For example, you can have an unlimited the cloud storage in Google Drive if you have a team of 5 or more users. But if not, it can be of 1 TB per user. And in Hangouts, you can make video conferences with up to 150 participants simultaneously.
Google Workspace Enterprise
The Enterprise plan is the most complete of all, therefore is recommended for large companies. Mainly those that need extra features for data protection.
The main difference from the other plans is the extra security layer that makes your Google Workspace account be more protected.
Besides that you have a resource to record your video conferences and archive them on Google Drive. The number of simultaneous participants on these video conferences rises to up to 250, and they can be transmitted for up to 100.000 spectators.
How to set up Google Workspace
Nothing more thorough than learning how to set up your new Google Workspace account through complete step-by-step. Follow this to avoid mistakes while signing up.
First things first, you need to access Google Workspace’s website and click the button Get Started.
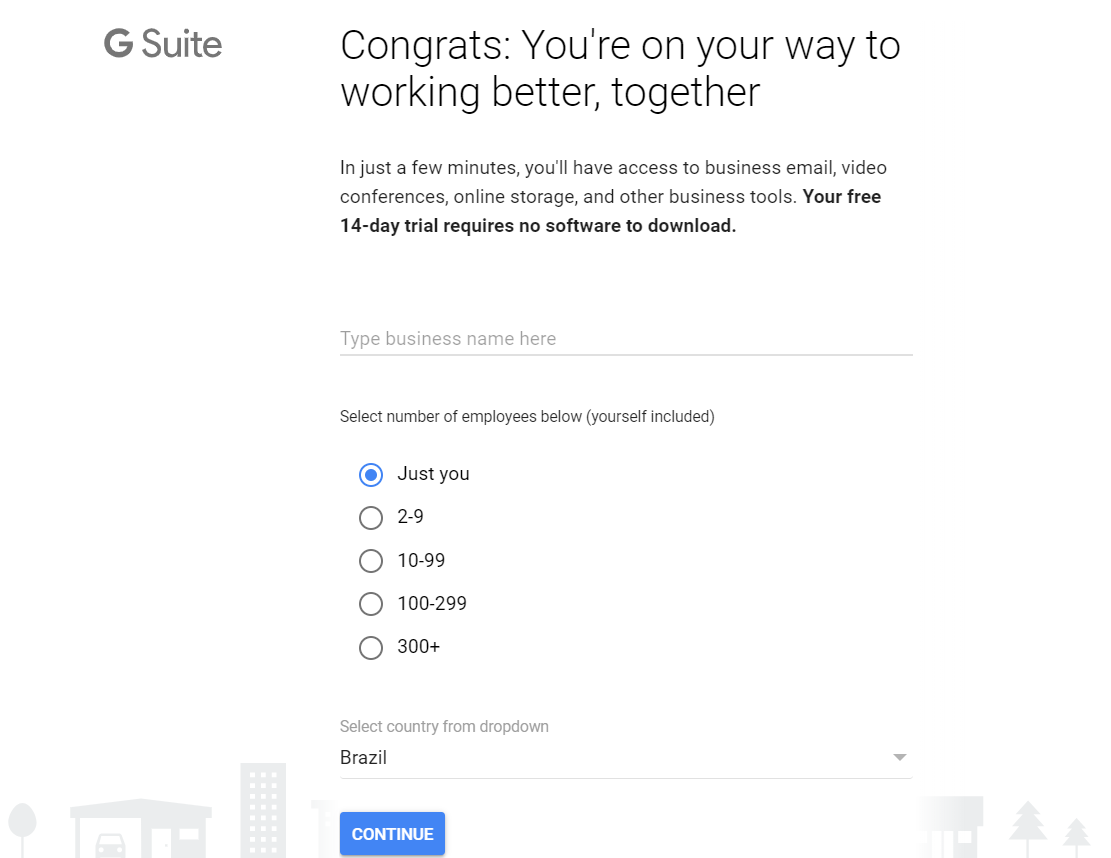
Step 1: Business Info
On the first screen, you need to type your business’s name, then choose the number of employees in your company. Remember that you can always add more people as your team grows. At last, choose the country where your company is located.
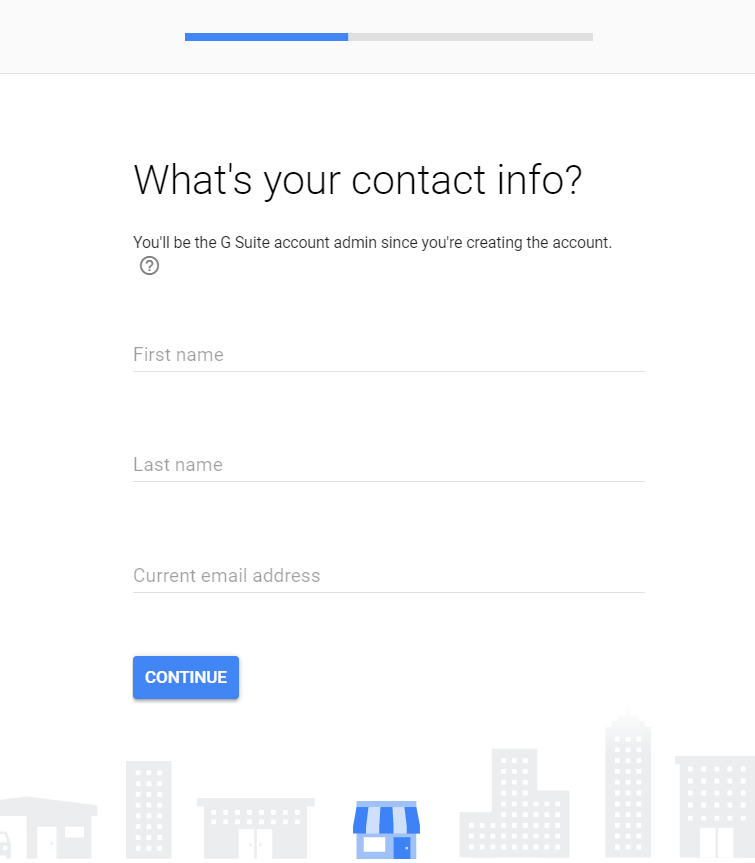
Step 2: Contact info
The second step consists in filling your contact information. Since you are setting up the account you are going to be the admin. So put your first and last name, and your current email address, maybe a Gmail one that you already use for years. This information will be useful if you need to recover your account later.
Step 3: Setting a domain
Next, there is the part where you need to have decided about your domain. Choose between three options:
- I have a domain: when you already have a domain for your website.
- I’d like to buy a domain: if you want to buy a customized domain to set Google Workspace
- I’d like a free .page domain: if you don’t want to pay for a domain, and instead have the free one (yourcompany.page)
The next screen will be different depending on what you chose on the previous one. You will be able to find a domain for your business, in case you chose the option to buy one. If you opted for acquiring a free domain, you can also search for a name, but with “.page”. But if you already have one, just insert it on the text box. Google Workspace will verify it later.
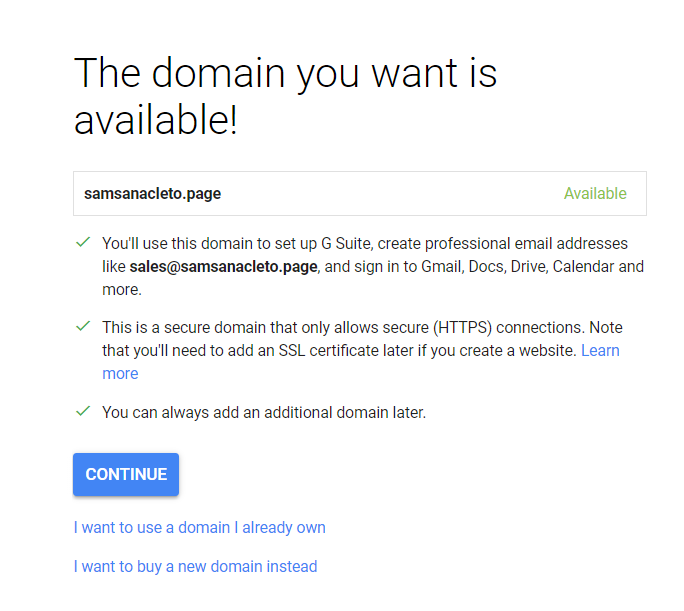
After choosing your domain, Google Workspace will return with the information on availability. After choosing a valid one, click Continue.
Step 4: Business localization
Following, you need to insert your business information, such as:
- Street Address
- Neighborhood
- City
- State
- Postal code
- Business Phone number
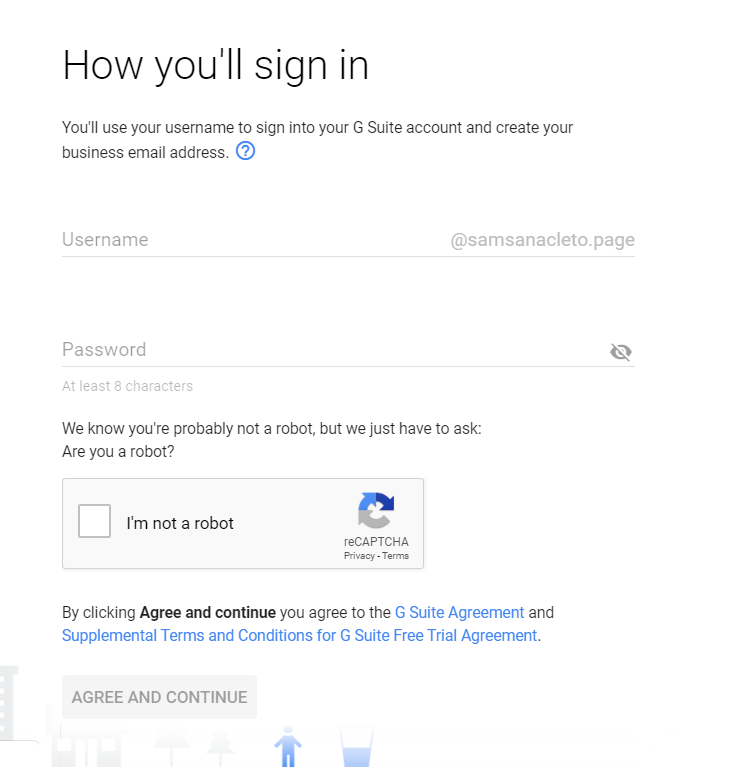
Step 5: Login and password
Choose your username and password to log into your Google Workspace account. Be aware that this username will also be your business email address.
Remember that is extremely important that you insert a strong password to keep your account always secure.
Step 6: Review and pay
On the next step, you can review your payment plan. You can see the plan you first chose at the beginning, as you can see on the example we chose the Suite Basic, which currently costs $6/user/month.
You may have a small discount on the first 12 months, if available at the time you are setting your account. It’s also possible to use a promotion code, in case you have found or earned one.
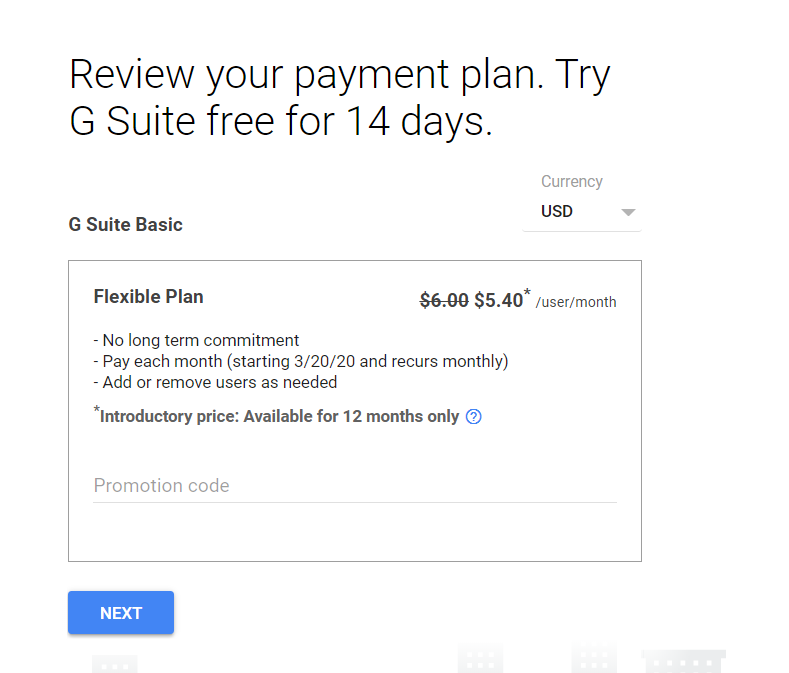
At last, the final page will be displayed, where you will be able to review all the information you have provided on the process. Also, this is where you can enter your credit card details, to be eligible for the 14-day trial. After clicking next, your account will be created and you can configure your account.
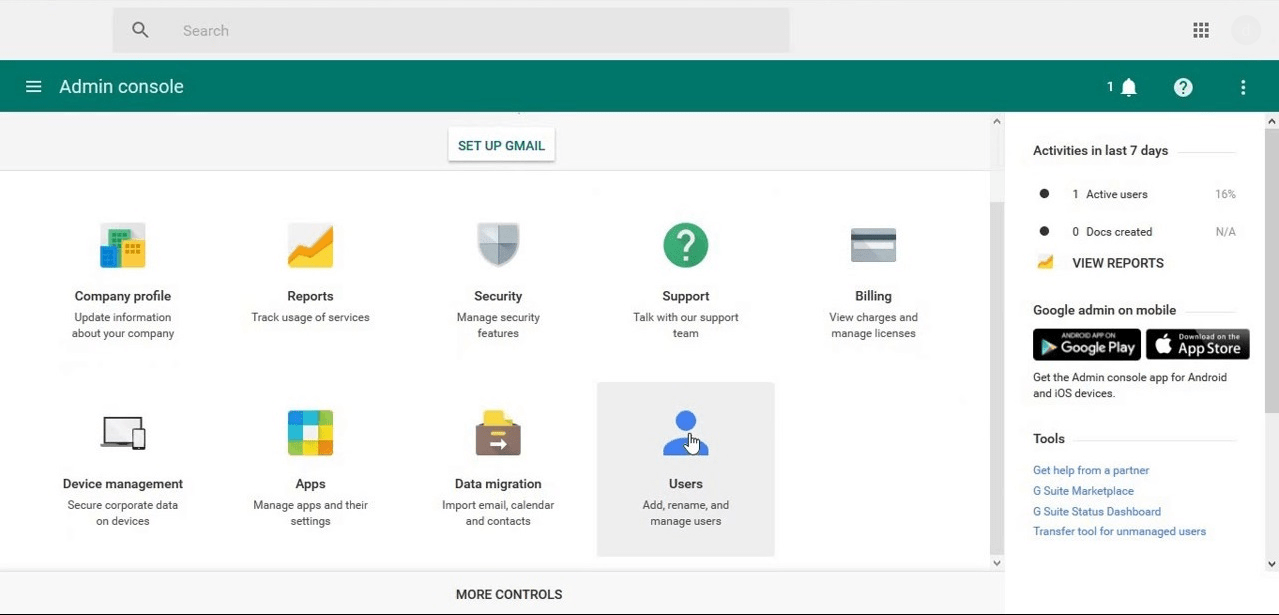
Step 7: The admin page
This is where you will set up your Google Workspace account with some main actions, such as:
- Add new users
- Create Groups for users
- Verify your email address
Let’s see how to set each one of these option in Google Workspace.
Add new users
Even after creating your account for a certain number of people, you can add more whenever you need to on the admin panel. Here are the steps you need to follow to add a new user:
- Go to the admin panel and click on Users.
- On the top left of the page click on the “+” icon.
- Type in the first and last name of the user. It’s optional, but you also can add their personal email and a profile picture.
- Next you are going to create a password for this new user. You can also click on Automatically Generate A Password, and Google Workspace will create one for you.
- Finally hit the Add New User button.
Create Groups for users
Having diverse users in your Google Workspace needs a thorough management, that’s why you can divide them into groups. This way you give the permissions they need to have at once. Moreover, you can create emails for a team inside your domain, for example sales@ or support@.
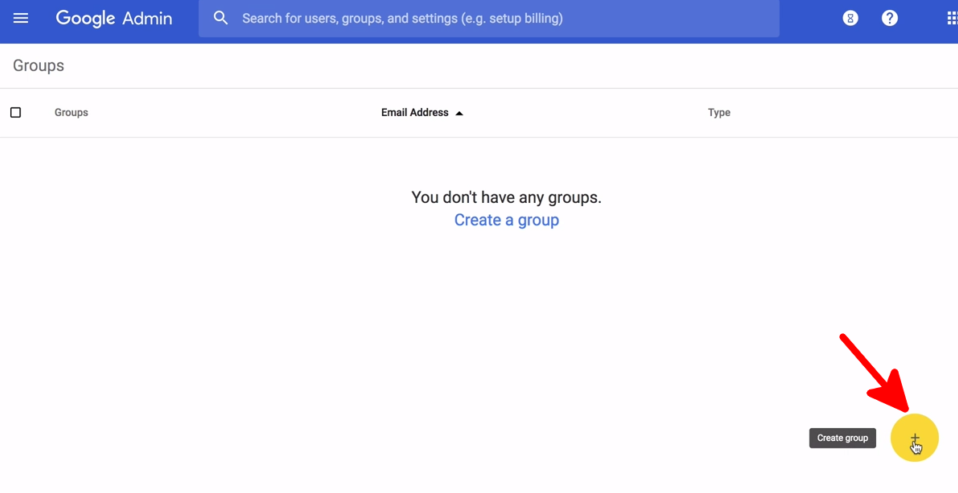
To create a new group:
- On the Admin Panel click on Groups.
- Then click on the “+” yellow icon, located on the bottom of the page.
- Enter a name for the group, such as “Marketing”, “Sales”, “Support”.
- Next, you need to create an email address for this group. The ideal is that the alias matches the name of the group.
- At last, choose what access level this group will have.
Verify your domain address
This is an important setting that you need to give special attention to. Mainly because you need to verify your domain address to use the Google Workspace apps.
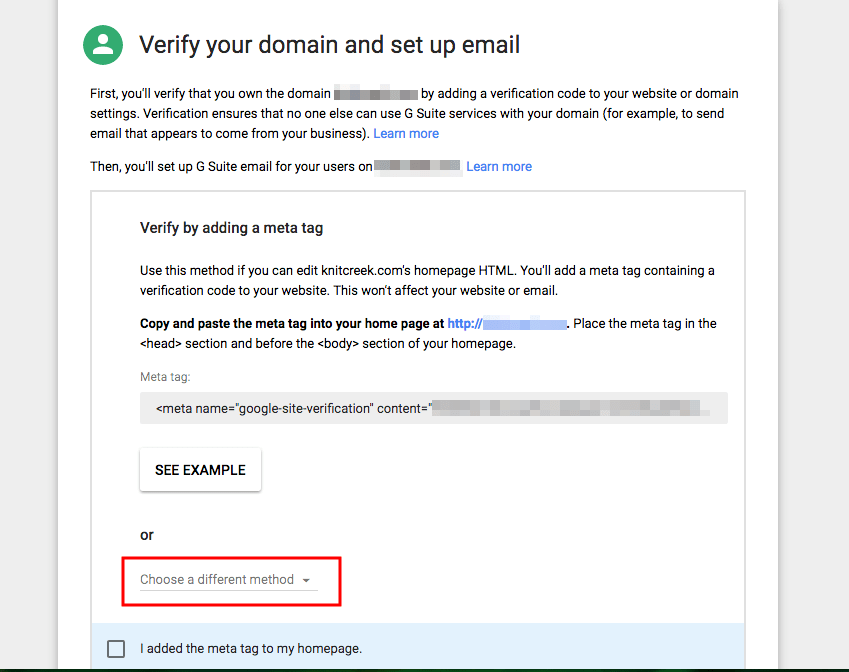
Follow these steps:
- At the top of the Admin console Home page, click on Set up Admin Console. A tab will open, and at its bottom, on the selection list, click on choose a different method. Then select Add a domain host record (TXT or CNAME).
- Copy the code on the field value/answer/destination.
- Next, sign in to your hosting account, click on the DNS section and choose Add custom records. Then paste the code you have copied on the previous step.After verifying your Google Workspace account it will become active, and you can start using all the apps normally.
Wrapping up
Now you know how to set up a Google Workspace account, and if you followed our step by step, it should be ready to be used by now. So we have some tips on how to use it in the best way possible, to manage all aspects of your business. Why don’t you take a look at some of these articles?
Google Workspace Shared Mailbox: you are (probably) doing it wrong!
Migrating to Google Workspace? Here’s everything you need to know about it.
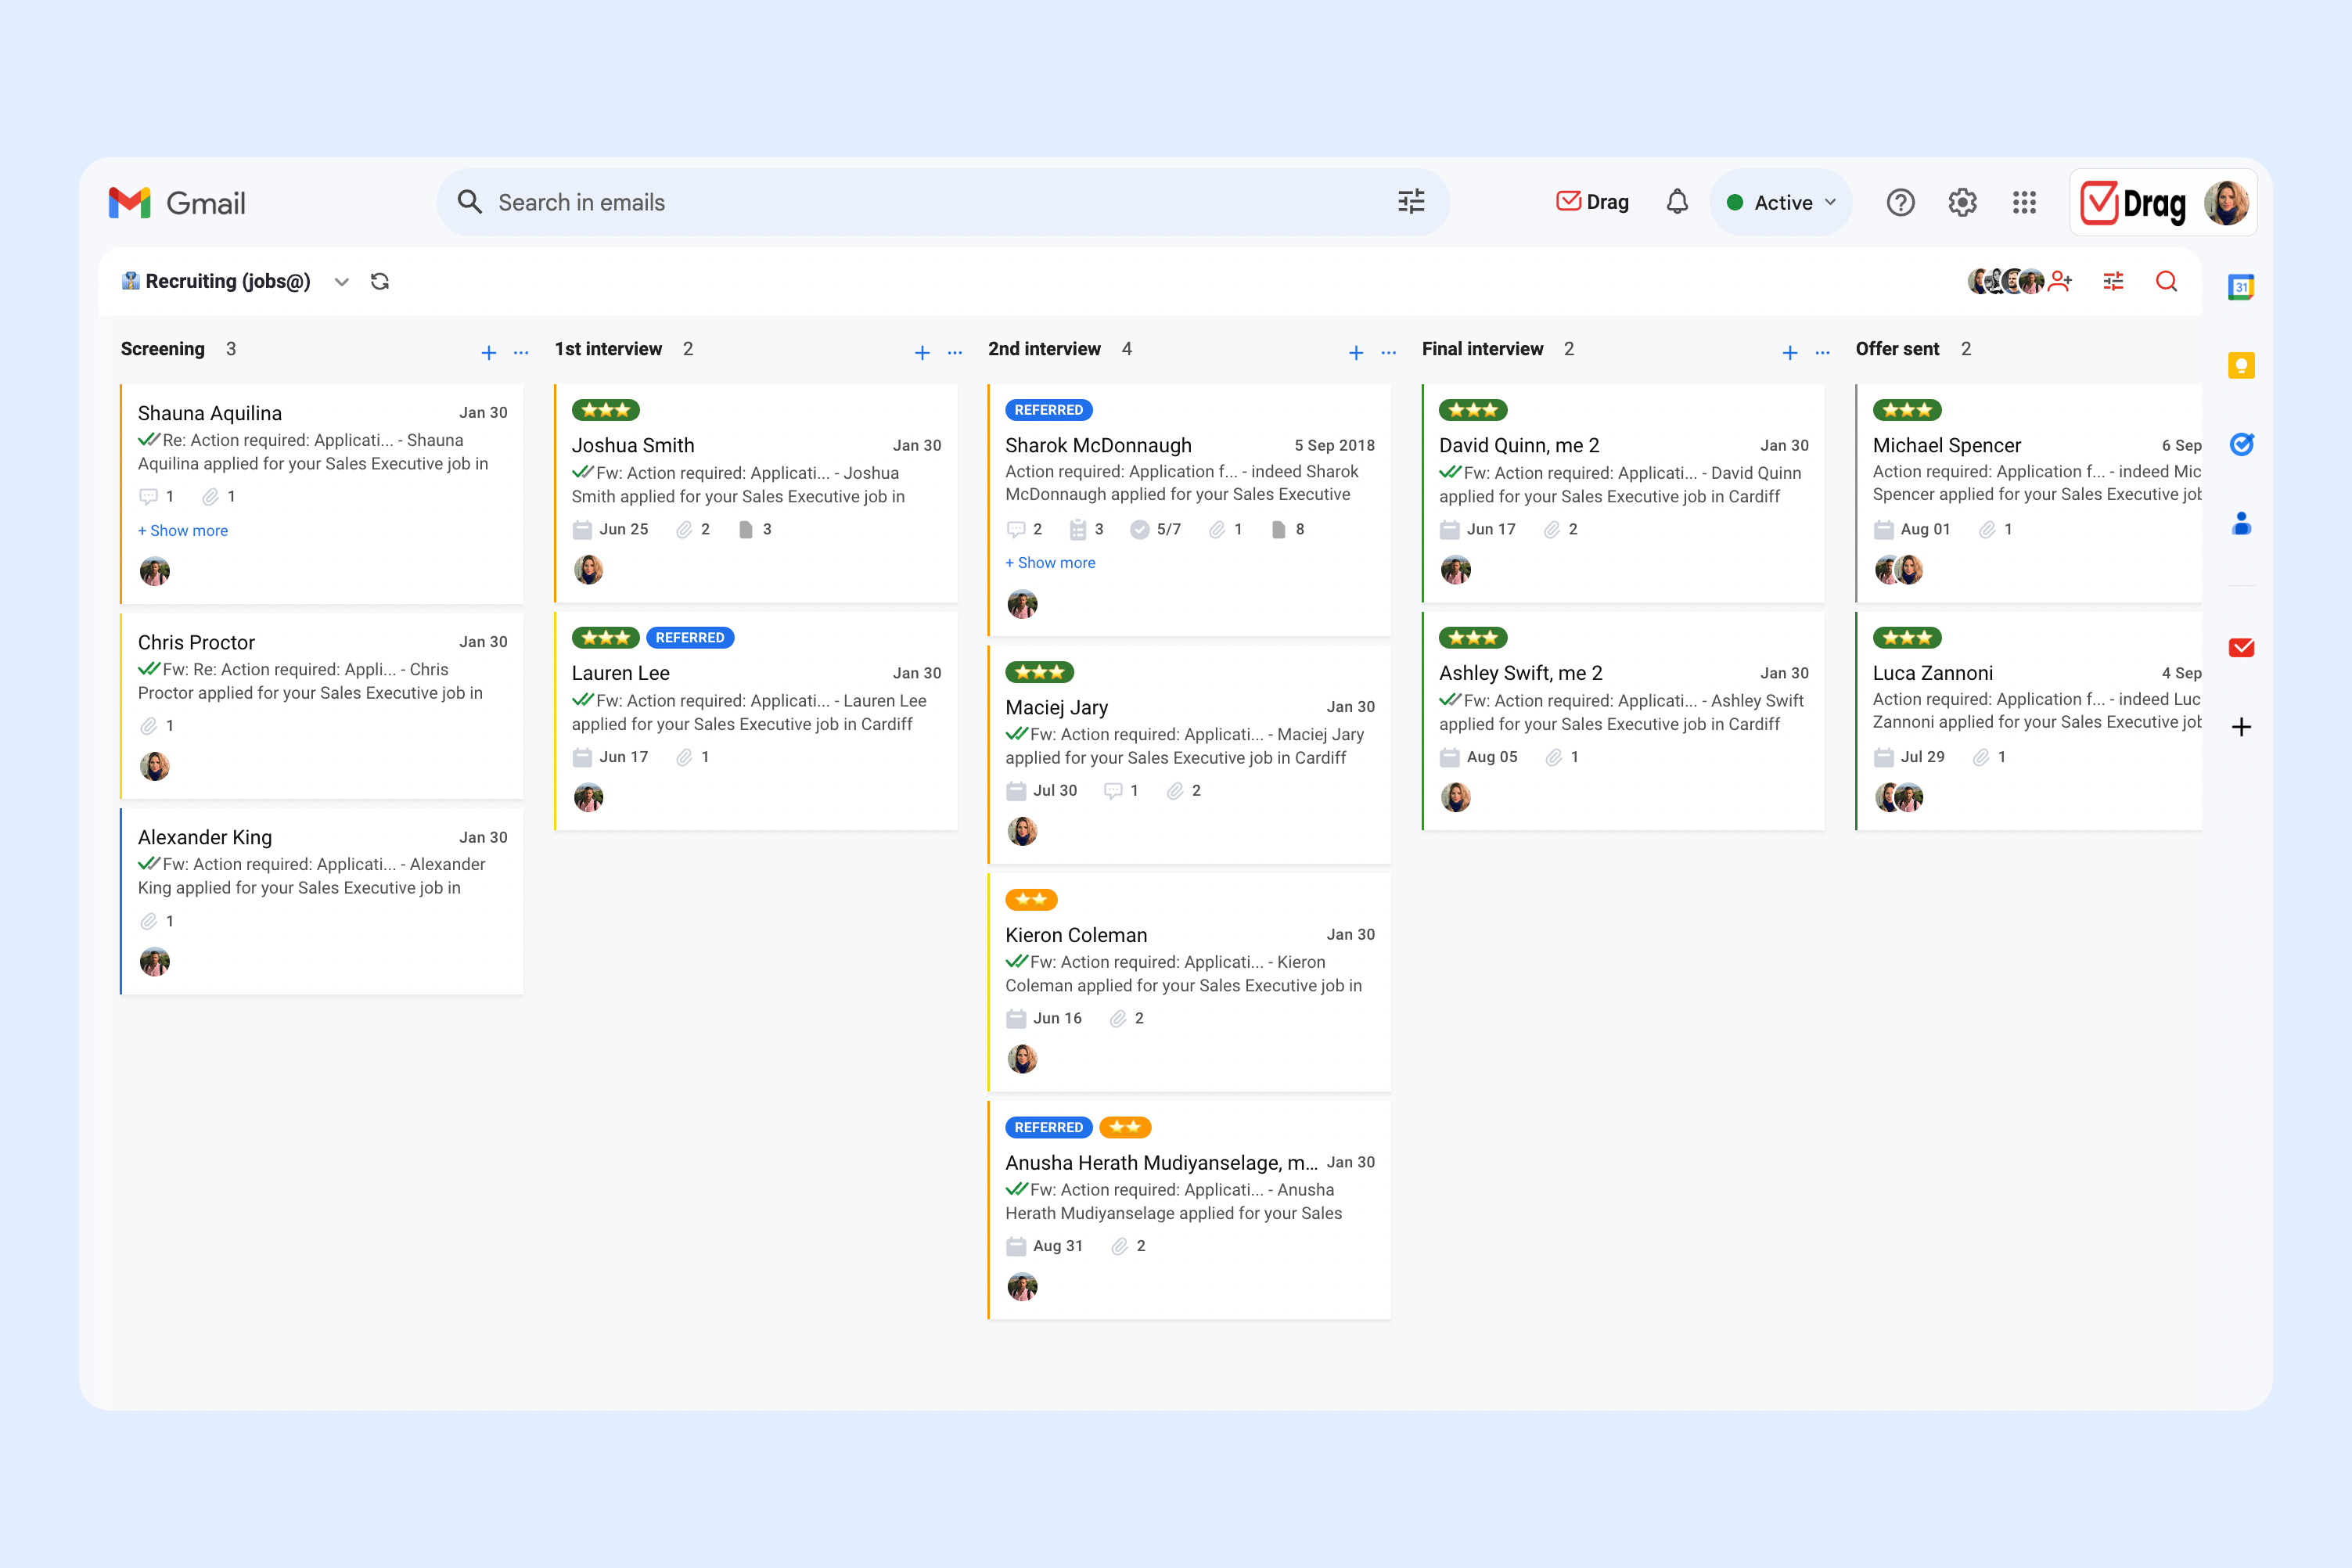
Power up your Google Workspace.
Drag turns Gmail into your Team’s Workspace – One single place to support customers, manage tasks and close deals, from the place teams love: Gmail.
And now that you know how to set up your new Google Workspace account, how about powering it up using Drag to collaborate with your team?