How to Keep Your Inbox (Super) Tidy With Gmail Labels
Here is everything you need to know about Gmail labels and how to use them like a pro to organize your inbox like you never have before.
Table of contents
Finding an email within an inbox can be distracting. Gmail labels are the secret weapon that allows you to run your inbox on your terms. However, it does require attention to manage and continually use. You need to set up efficient labels and have a system to update them whenever your workflow changes. In this article, you are going to learn more about the Gmail labeling system, and how to use it alongside filters to have the tidiest inbox you have ever seen.
Key Findings
- Gmail labels act as customizable tags, allowing users to categorize emails into folders based on projects, workflows, or priorities.
- Nested labels (sub-labels) enable hierarchical organization, making it easier to track specific aspects of larger projects or responsibilities.
- Labels can signal task urgency or project stages, helping users allocate time and resources effectively.
- Color-coded labels enhance visual clarity, enabling users to identify critical tasks at a glance.
- Automated labeling using filters streamlines workflows by categorizing emails based on sender, subject line, keywords, or attachments.
- Shared inbox solutions like DragApp enable teams to use shared labels for collaborative workflows. These labels help categorize tasks by priority, type, or project stage across multiple team members.
What are Gmail labels?
We use labels as a method of categorization of almost anything that consists of attaching a tag that gives some information about it. With emails, you can do the same, to organize your inbox according to your needs. Basically, when you label messages, you move emails to folders. It facilitates how you visualize your inbox and how you handle your emails. It helps clean up Gmail, yes, but also makes it much easier to check what the priorities are. For instance, if you create a label for a new project and it fills up quickly, you know it's critical to dedicate a bigger part of your schedule to it. You can label all the emails in your inbox —the ones you send, receive, and even the drafts. Also, you can apply as many tags as you want to one email, which makes it possible to organize your email account in infinite ways, personalized to your own experience.
How to create labels in Gmail
There are three different ways to create a new label in Gmail. It’s interesting to know all of them because depending on what you are doing at the moment in your inbox, they can be handy.
- First, on the left side menu, scroll down until you find the button Create new label. A pop-up to create a new label will appear.
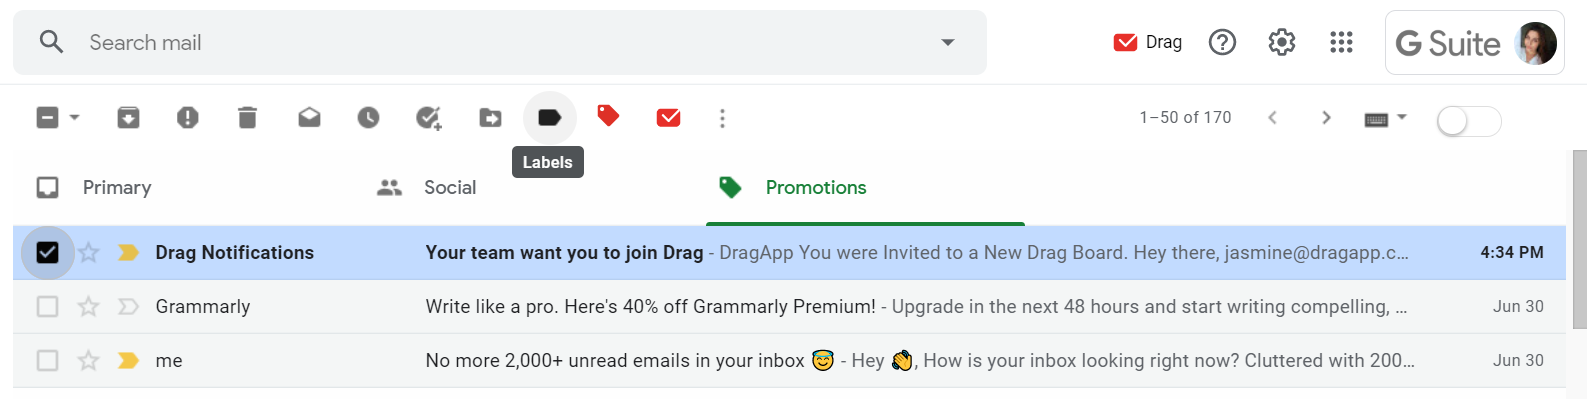
- If you already have some displaying emails in your inbox that you want to attribute labels to, you can just select them. Another toolbar appears right under the search bar. Click the Labels icon. A drop-down menu will appear, containing all the labels you have, and at the bottom, you will find the option to create a new label.
 The process is the same for when you open an email:
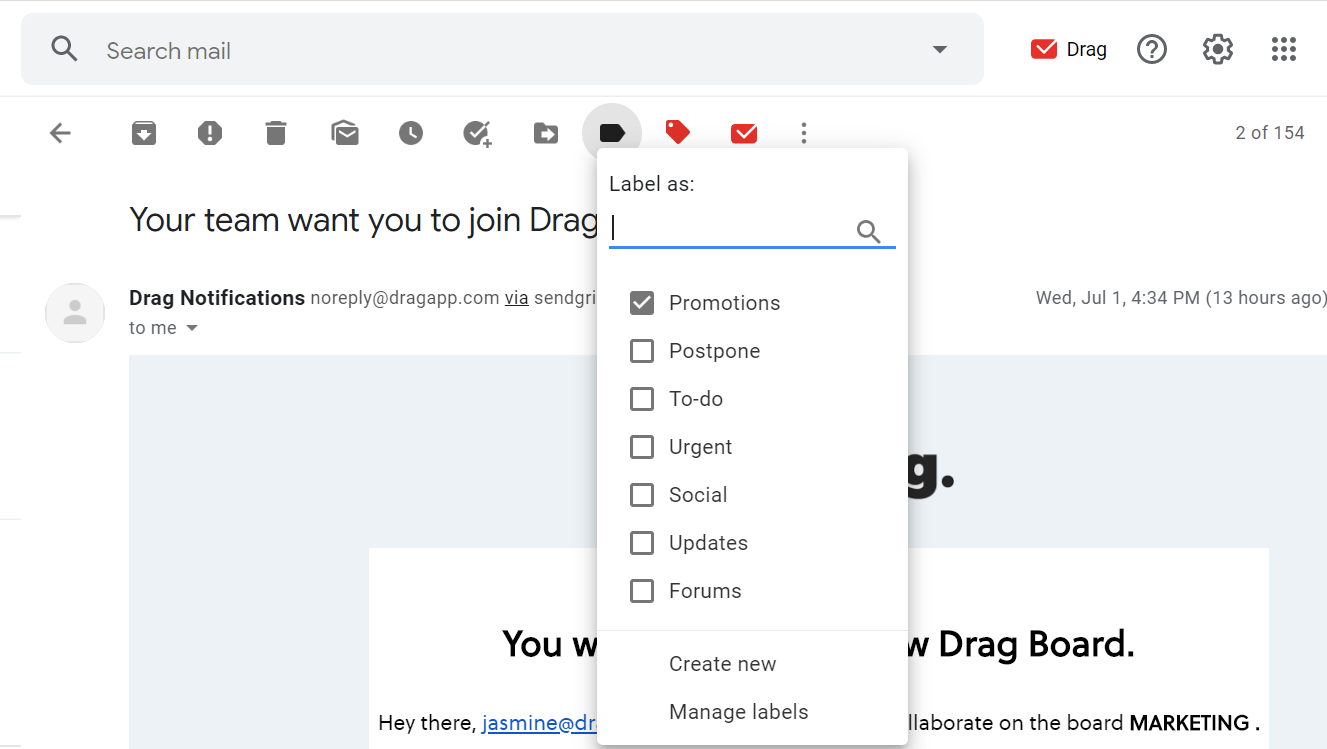
- On the top right of your screen, click Settings > See all settings and choose the tab Labels. Scroll down the page to find the button Create new label.
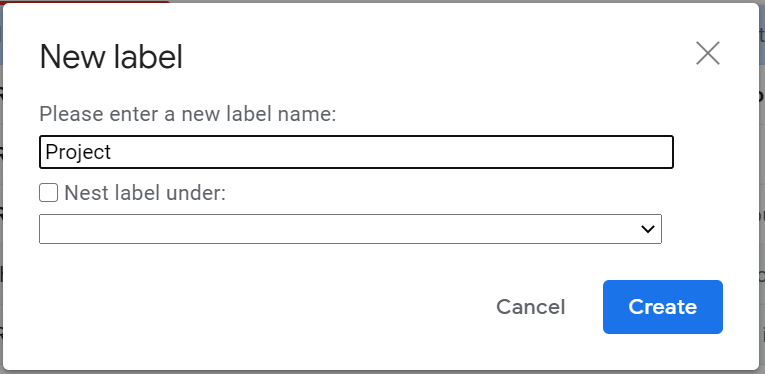
 No matter which method you choose to create, Gmail will display the same pop-up, where you can type the name of your new label:
 What are nested labels and how to create them
Nested labels allow you to go even further in your inbox organization. They are sub-labels that go under your top-level labels.  So you can create a general label called Project A and add different nested labels, such as Development or Budget, for example. That helps you search for specific steps and responsibilities attached to the main subject. To create a sub-label under the parent label you just created:
- Click Create new label again;
- On the New Label pop-up, type the name of the sub-label you want to create;
- Select the Nest label under checkbox, then choose the parent label you created before from the drop-down list;
- Click Create.
In this example, we created the parent label Project, and a sub-label called Budget: 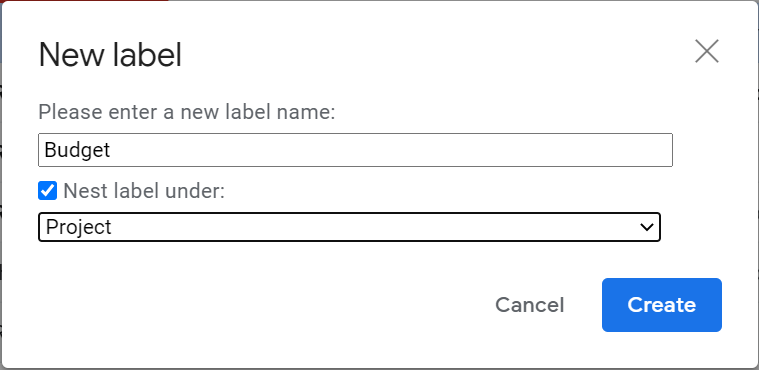 The hierarchy of labels will be on the left-side menu, as you can see above:
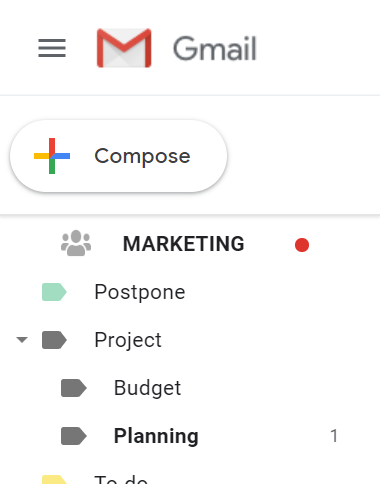
How to turn an existing label into a sub-label
If you want to change the hierarchy, you can transform a label into a nested label:
- Click the three-dot icon next to the label’s name;
- Select Edit from the drop-down menu;
- Then choose under which label it will be nested.
How to apply Gmail labels to new messages
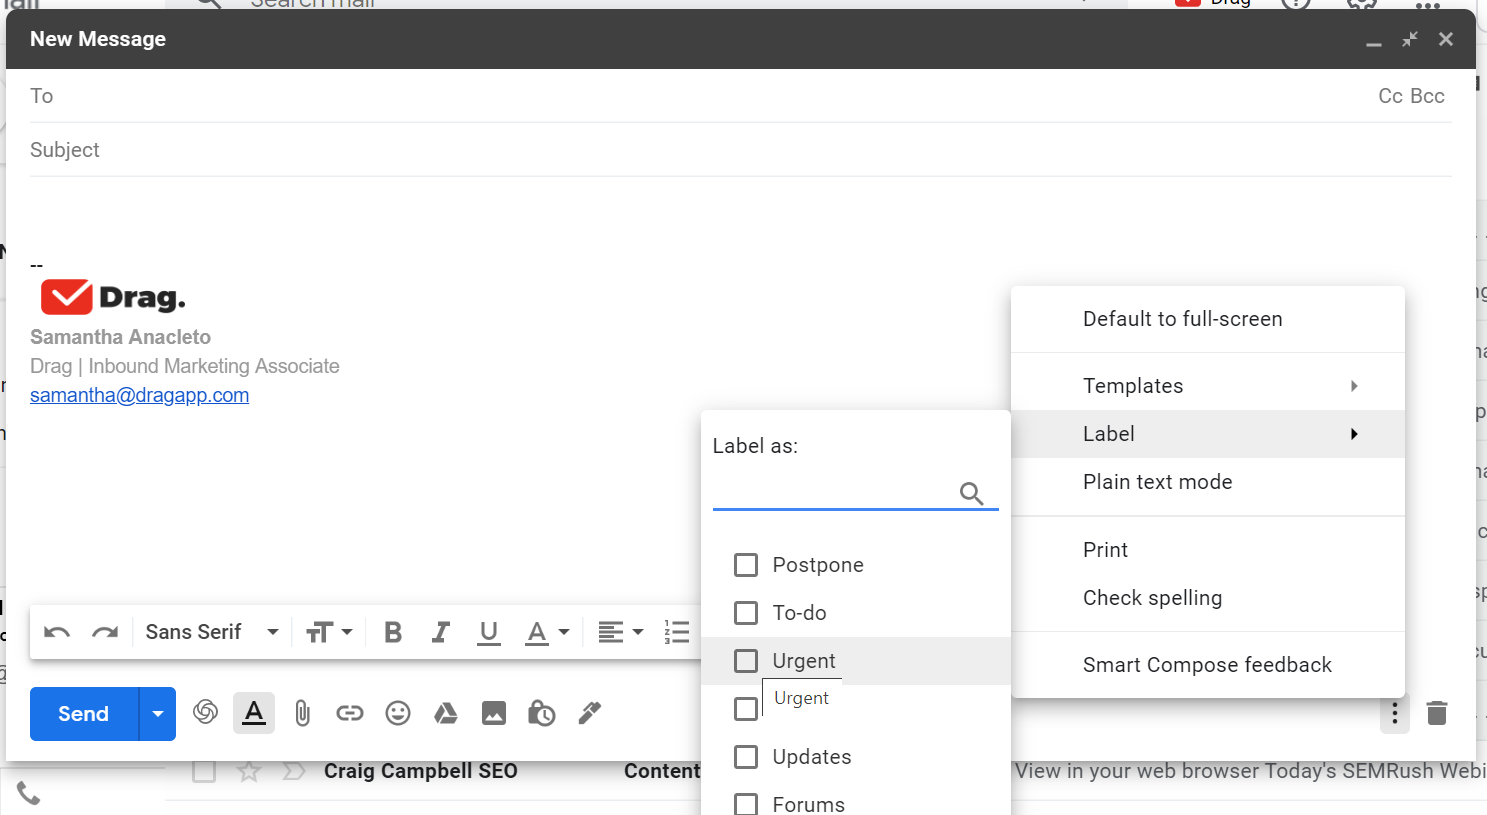
Adding Gmail labels to incoming mail is already beneficial to your workflow. But you can also use Gmail labels in the new messages as you're writing them. This allows you to certify that these messages are in the right folder from the beginning, which helps in keeping the workspace tidy and productive. To apply a label on a new email:
- Click on the three-dot menu icon in the bottom left of the compose window;
- Hover the option Label and choose the tag you want to apply;
- You can create a new label as well. Scroll down and select the option Create new.
Try Drag free. Shared inbox + AI inside Gmail
200,000+ teams use Drag to manage shared emails. 7-day trial, no credit card.
How to manage labels in Gmail
Once you have learned how to create and apply your labels, you need to know how to handle them: move, rename, delete, and add colors. Everything that will help you personalize your organization even more.
Editing the label color
By default, when you create a label, its color is gray. But you can edit the color according to your needs. We highly recommend that you change the color of each one of your labels so that you can have a better visualization of your tagged emails. So for example, if you have a label “urgent”, try to use colors like red or orange, which often brings the meaning of urgency. To change the label color, follow these steps:
- On the left side menu of your Gmail inbox, find your label’s name and click the three dots next to it.
- Select Label color.
- Choose the color you would like on the label.
- You can customize it on the same section, and even delete it whenever you want.
How to rename Gmail labels
Whenever you need to rename a label, go to the left-side menu of your Gmail inbox. Then find the label’s name and click the three dots next to it. Find the Edit option. The same pop-up to create a tag will appear, and you can change its name and save it.
 How to remove a label from an email
If you have labeled the wrong email, it’s easy to remove it:
- Select the email by marking the checkbox next to it.
- Click on the tag icon in the menu right below the search bar.
- Uncheck the label(s) you want to remove.
If you opened the email, you could also remove a label by merely clicking the ‘X’ button next to its name.
 How to merge Gmail labels
In case you want to unite two or more Gmail labels, follow these steps:
- Enter the names of the labels you want to merge in the search bar by typing label:name. For example, if the two tags you want to join are “To-Do” and “Urgent”, then it should be – ‘label:Urgent OR label: To-do’.
- Gmail will display the results for both labels;
- Select all emails;
- Click on the tag icon and create a new label.
How to delete a Gmail label
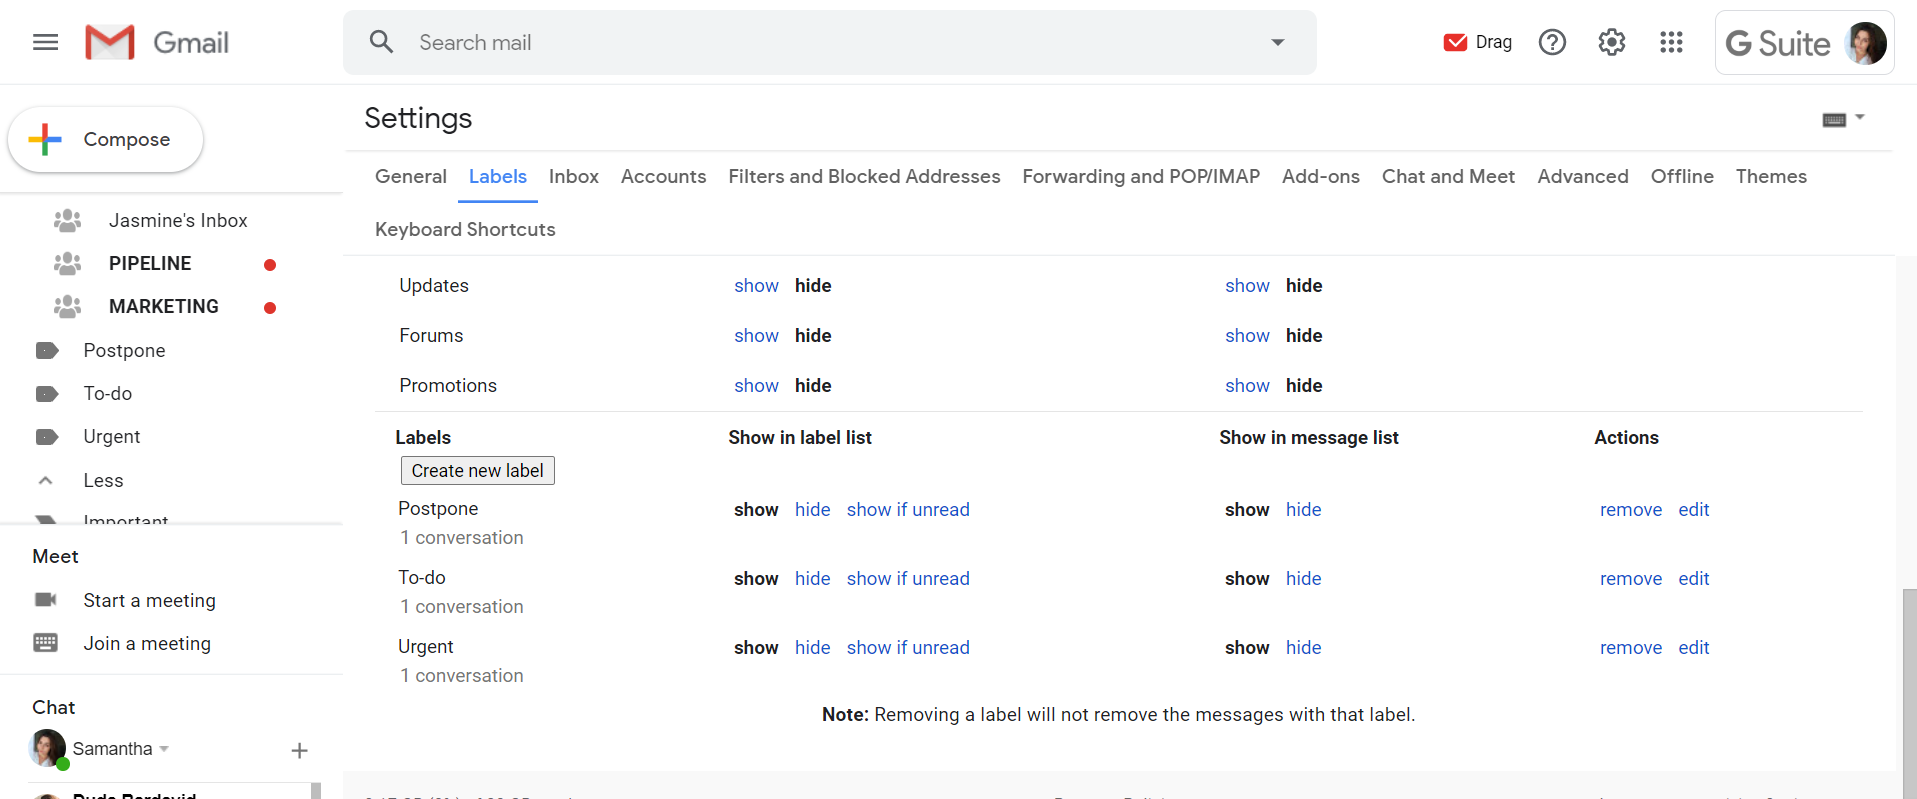
Sometimes a label can get out of use and utility, so it’s time to delete it. To remove tags, go to Gmail settings:
- Click on Settings > See all settings;
- Access the Labels tab;
- Scroll down and find the label you want to delete;
- On Actions, click Remove.
Using Gmail labels for a better mobile experience
One of the best features of Gmail labels is the ability to decide which email notifications you get on your mobile. The best part is that you’ll prevent receiving so many distracting emails. To turn on notifications on your mobile app based on labels, do the following steps:
- Open the Gmail app on your phone;
- In the top left, tap Menu (the three aligned bars icon);
- Click Settings;
- Select your account;
- Select Manage Labels;
- Tap on the desired labels as Important;
- Then click Sync messages, and next select Last 30 days or All.
- At last, choose your notification settings for that label.
Automate Gmail labels with filters
To make your organization even more complete, you can associate your labels with Gmail filters. This means that instead of manually applying tags to each incoming email, you can have Gmail automation do that for you. Before setting the filter, you need to consider what would make an incoming message fit into a particular label. You can use several different types of information to label them, such as:
- The sender’s email address or domain name;
- A specific word in the subject line;
- A specific word in the body of the email;
- Or even emails with an attachment;
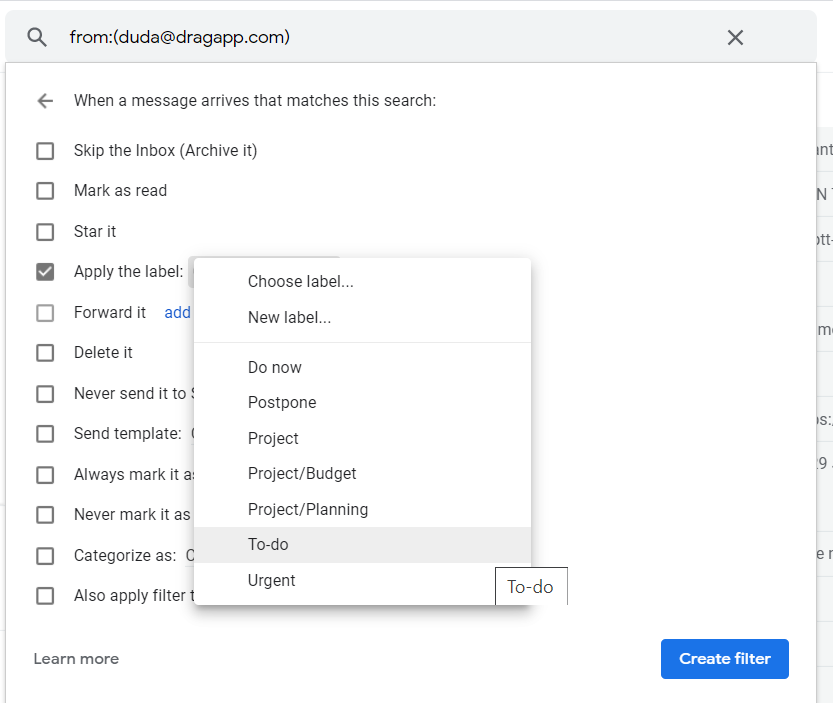 For example, you can filter all emails containing the sentences “by tomorrow”, “by the end of the day”, and add the label Urgent. Another idea is adding an automatic Finance label to messages coming from specific email addresses, such as invoice emails from your suppliers or your accountant's communication. Each workflow requires different filters and labels, so before you set them up, you should take a look into what kind of messages are more common in your inbox. Then, how can you categorize them? Some users prefer labels based on project stages, while others opt for overarching themes, such as invoices, customer questions and concerns, error reports, and so on.
Using shared Gmail labels with a shared inbox
Labels are excellent for your personal and even your business email account. But when you work with a team, you need to share your Gmail label system too. The first method is sharing the account itself. By using the same login credentials, the team members have access to all incoming mail and its labels and filters. However, this poses security risks and a lack of accountability. That’s where shared inbox solutions can provide the collaboration side that a regular Gmail account can’t offer. A shared inbox is a team inbox in which users can access and manage emails from their own accounts. That way, managers can assign emails from a single workspace and keep track of what's happening across the projects, enhancing accountability. 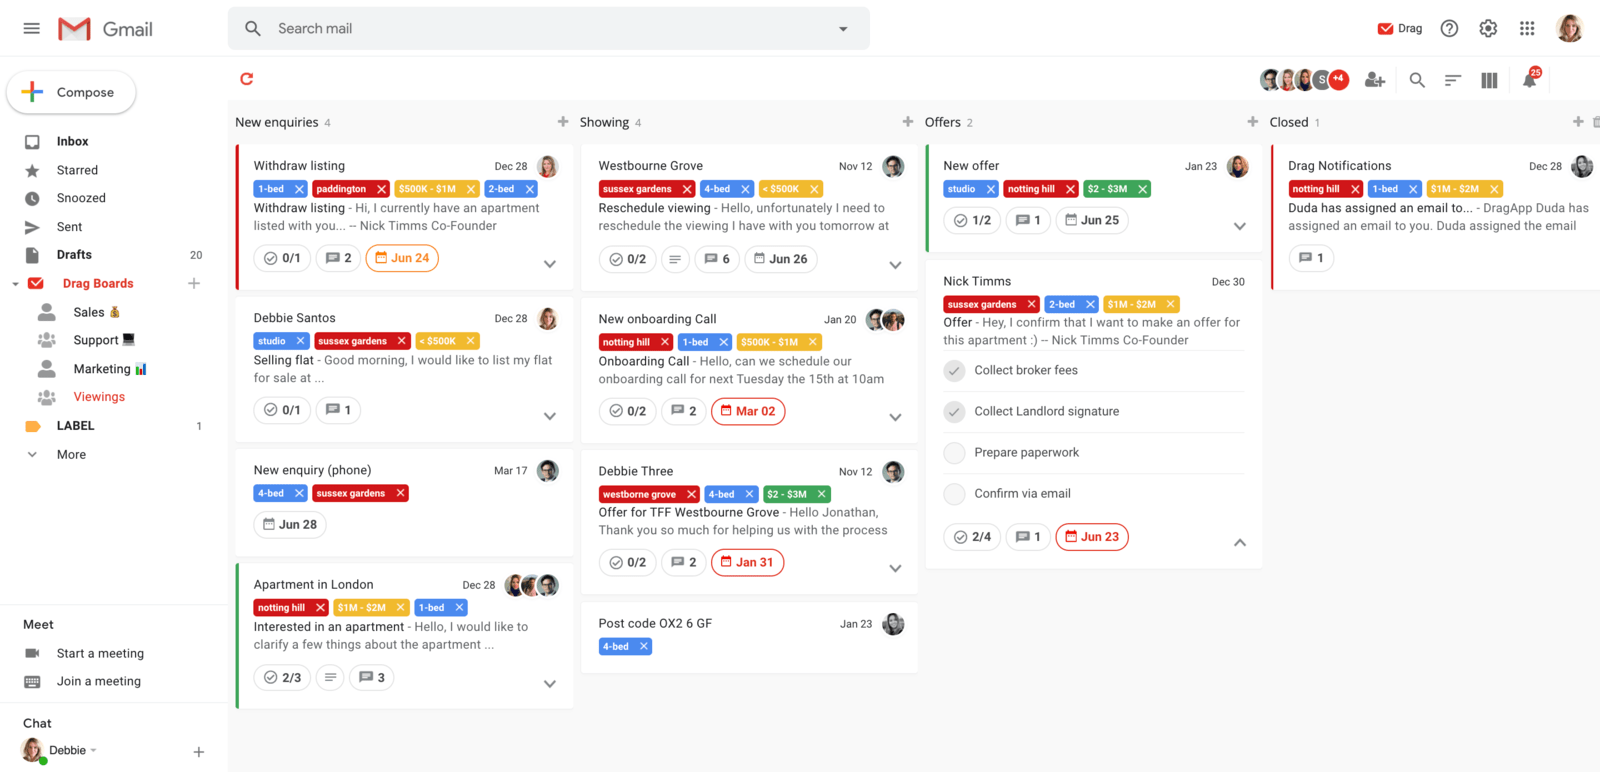 Emails reaching the team inbox, which can be support@company, sales@company, or marketing@company, among others, are visible to all, so keeping it tidy is critical. This is why shared inbox solutions, like DragApp, come with extra organization tools.
Shared labels
Besides allowing you to use the regular labels in Gmail, Drag offers shared tags for teams to apply to their emails and tasks. This way, it becomes easier to categorize pieces of workflows. They can be applied to one or multiple workspaces, which means everyone who has access to the inbox itself has access to them. For example, your Sales team can tag messages based on customer operation size, location, and lead tracking stage. ![]() On the other hand, customer service agents can use tags to prioritize their tasks, adding filters to organize tickets by level of criticality, type (bug report/help/feature request), and estimated time to complete. That way, managers can distribute tasks accordingly and your customer service metrics, such as resolution rate, will improve.
On the other hand, customer service agents can use tags to prioritize their tasks, adding filters to organize tickets by level of criticality, type (bug report/help/feature request), and estimated time to complete. That way, managers can distribute tasks accordingly and your customer service metrics, such as resolution rate, will improve.
Color coding
Besides creating specific labels, Drag allows users to color-code their tasks and emails. Just like Gmail labels, this systems help you check what the priorites are at a glance. 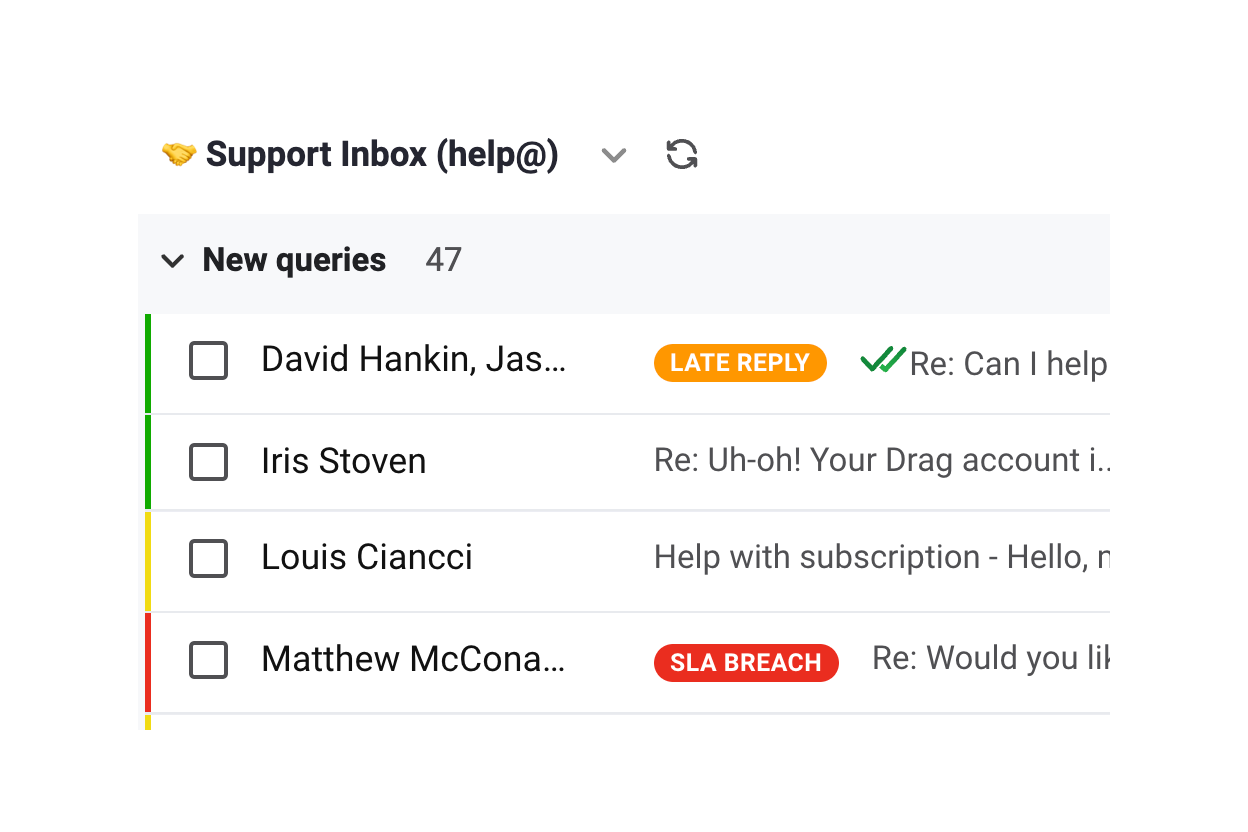 That means you don't waste time browsing through a messy inbox in search of relevant tasks. Instead, the entire team can visualize their priorities quickly and efficiently.
Label statistics
Another key productivity gain from DragApp is using analytics reports to avoid bottlenecks and improve workflows. With tag reports, managers can see relevant data about specific shared labels. Then, they can make informed decisions based on this data. 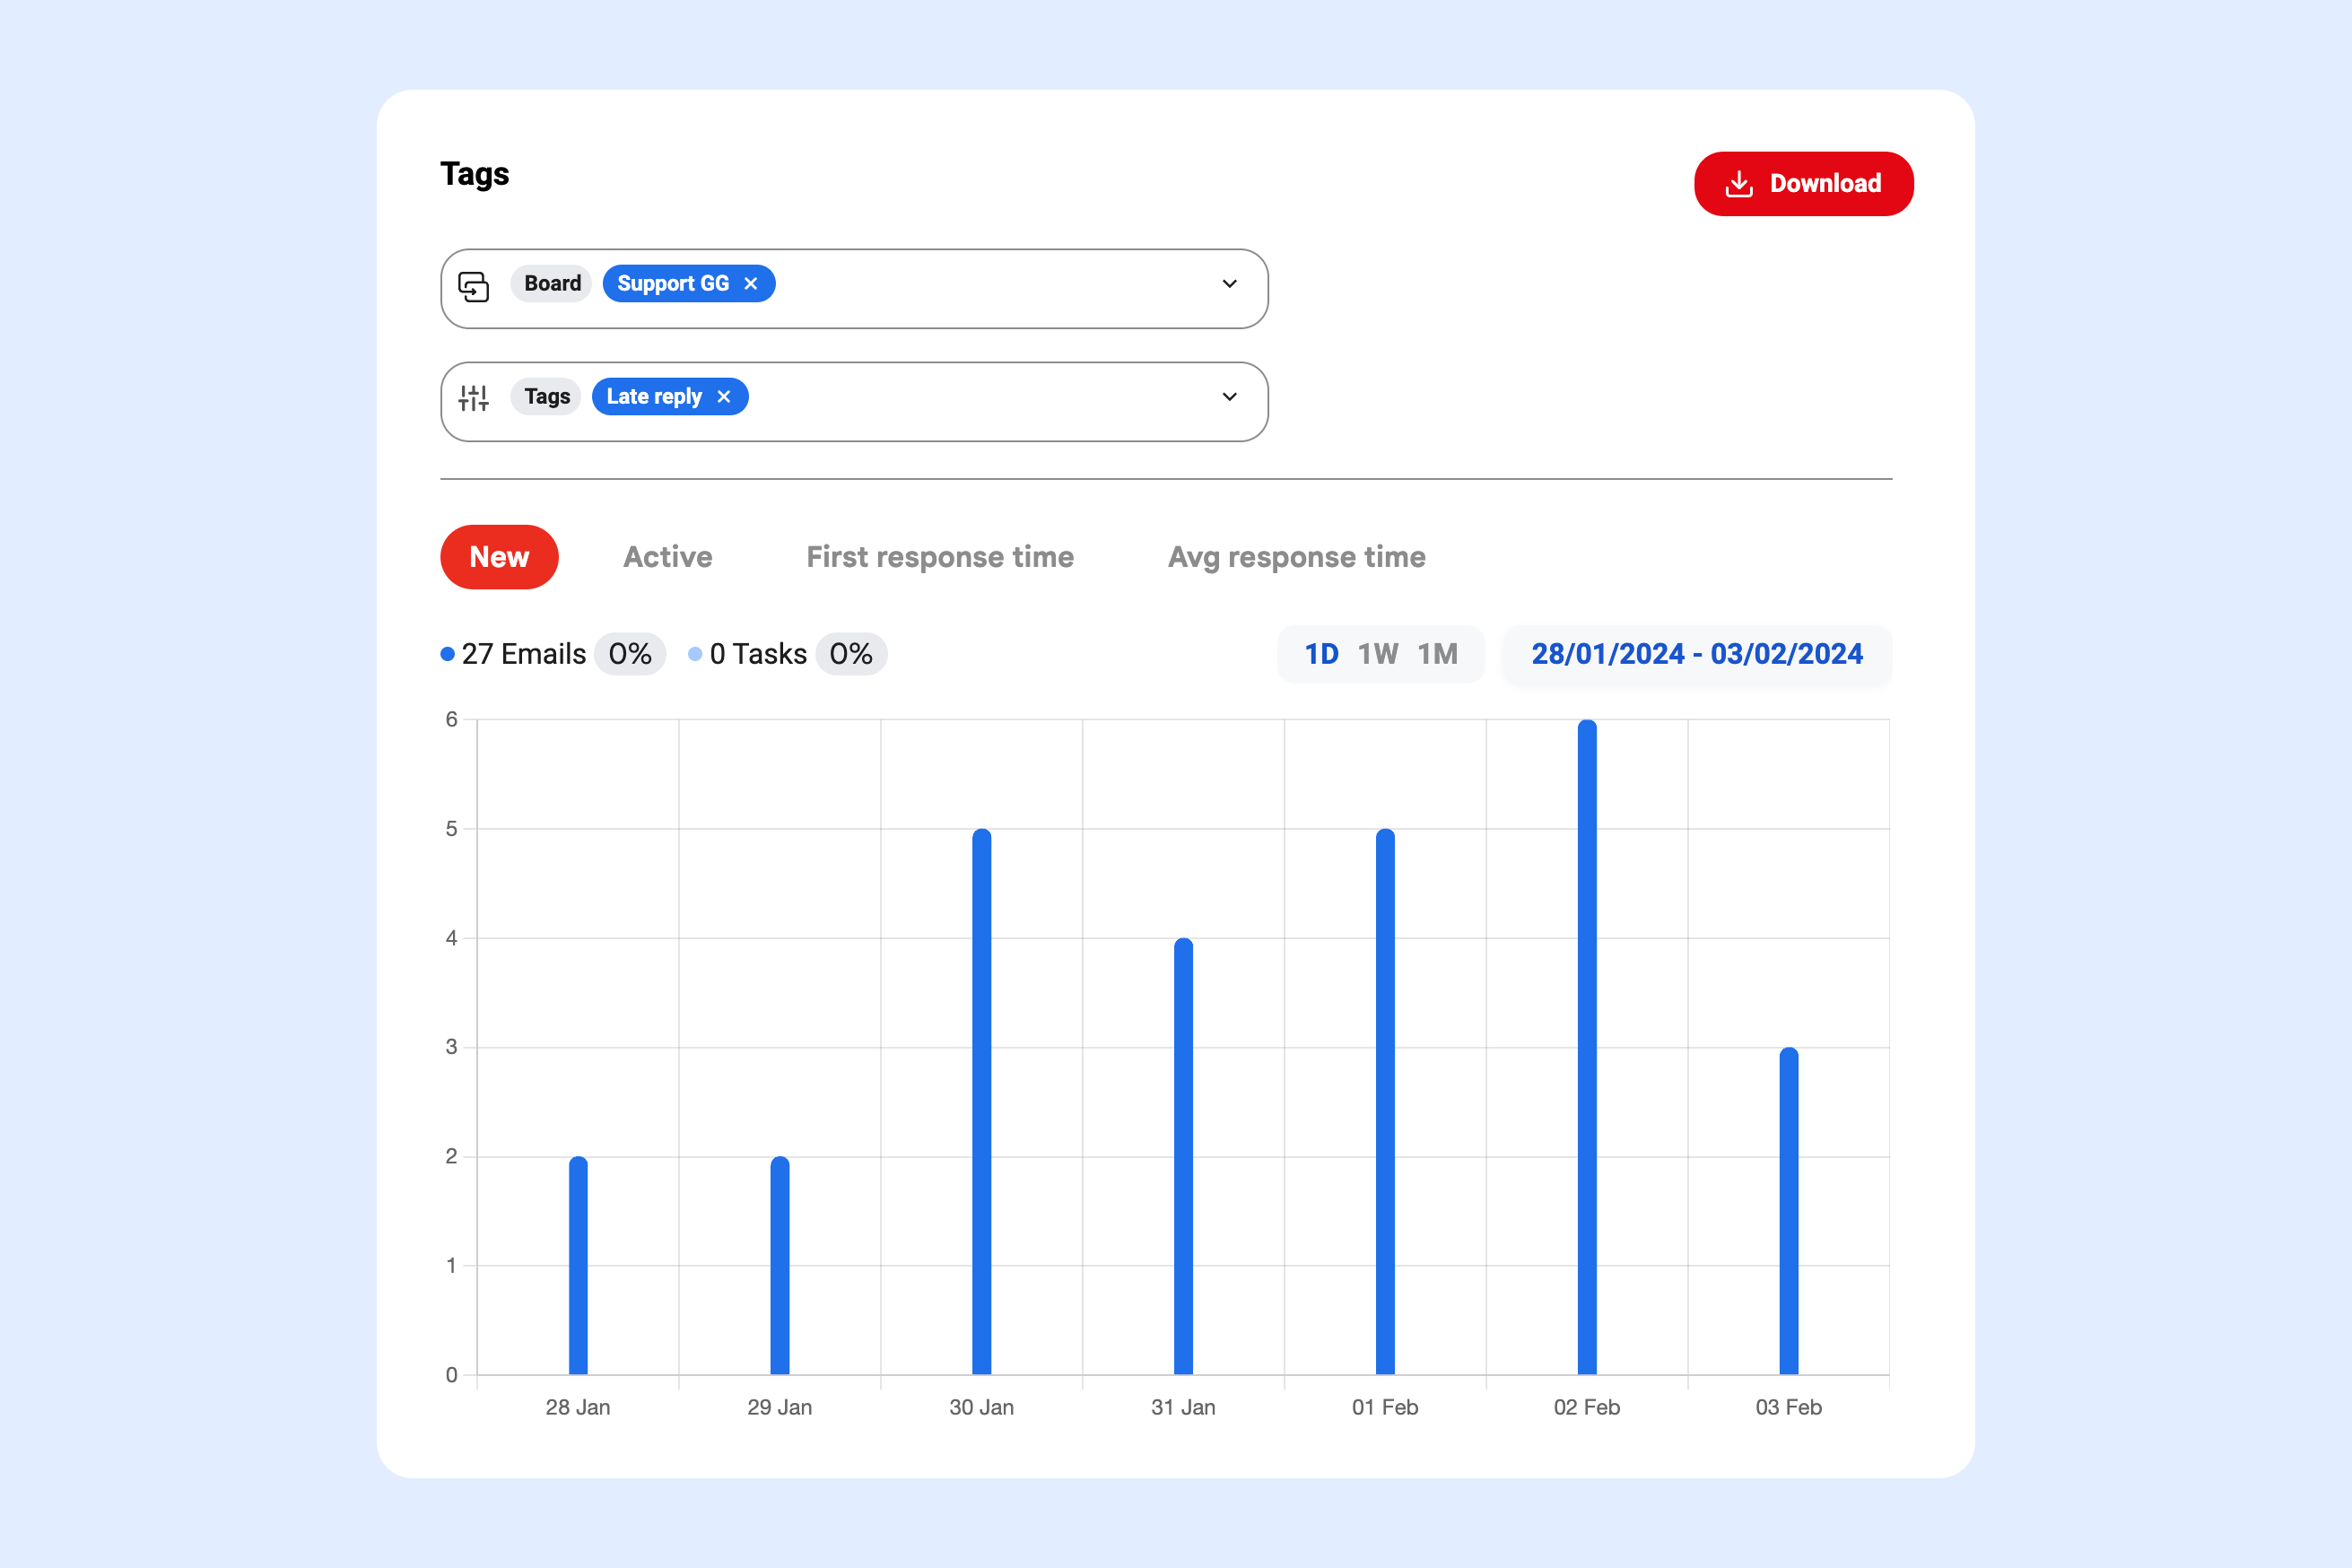 For example, they can see which labels have gotten the biggest message volume so that they can allocate more team members to specific projects. By looking into the response time on specific customer service tags, they can understand which products need more attention. In short, reliable data can take Gmail labels to the next level and help you redefine your workflow in a way that enhances individual and team progress.
Gmail labels FAQs
-
What are Gmail labels?
Labels on Gmail are filters that categorize your messages into folders. You can sort emails manually or automatically with Gmail labels and keep your inbox tidy.
-
What can you use Gmail labels for?
With Gmail labels, you can separate emails by project (and project stage), company department and different workflows. You can create labels for admin work, creative work, customer service and so on.
-
Who should use Gmail labels?
Gmail labels are useful for anyone trying to keep their inbox organized. However, small and medium-sized businesses that have email-based work benefit the most from it. Gmail labels can help smaller teams optimize their internal and external communication.
-
How to make Gmail labels better?
Gmail labels are great, but to work with a team, you need tools like a shared inbox and its shared labels. Then, you can apply the same organization rules across the board and keep all collaborators up to date on tasks and projects that come up via email.
Wrapping up
Duda Bardavid
Co-founder