Google Docs: The 2025 Ultimate Guide
Learn how to master Google Docs with these essential tips and tricks in the most complete guide of the year.
Table of contents
Google Docs is a free word processor developed by Google. It works online, so you can use it in your browser, without the need for installing the software on your computer. Simple in every way, you just need to have a Google account to start using it. This article will focus on this text editor, its many features, and how to use it properly in your business and/or personal life.
The benefits of using Google Docs
Some people still think that Google Docs is not that good and lacks some features that the major word processors have. However, Google Docs can be much more convenient than the pioneers in practicality and use modes. So let's see why you should consider using it for work or personal reasons:
A personalized user experience
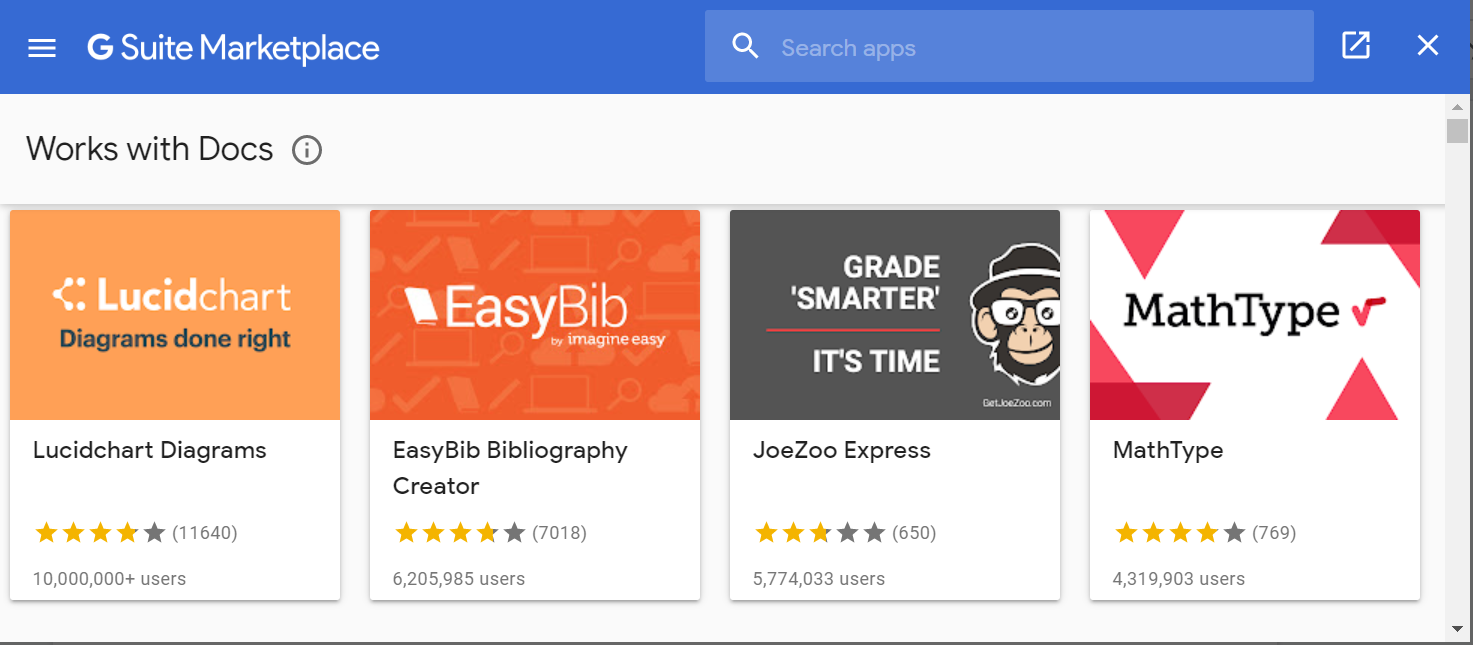 One great thing about using Docs is that you can use add-ons to personalize how you handle your documents. There are infinite kinds of add-ons available, such as proofreading, improving SEO, creating diagrams, and many others. To verify all of them, you can go to Add-ons on the top page and then click on Get Add-ons. A Google Workspace Marketplace popup will open, with a big list containing the most used add-ons. You can also search for others that are not on this list.
Everything is online
It means you don't need to keep lots and lots of documents on your computer. Besides, you can carry them anywhere you go. Mainly because it is possible to access Google Docs from any device, so imagine you have to edit an important document at the airport, for instance. You can access your Google Docs account and start writing on your cellphone. Many laptops nowadays don't have great storage, and that is why having an online solution of a word processor can be very helpful, because you don't have to install software that requires Gigabytes of your HD or uses a considerable percentage of your memory while you use it.
Everything can be offline too
 It's possible to turn your documents able to be edited offline. But first, you need to install the extension for Google Chrome that allows you to do this. It's important to remember that you can edit one document per time and not all of them at once. The process consists of accessing the tab File and clicking on Make available offline. Now you are all set to edit your document even in those moments when the internet fails you. At the same time, you can download your document in common formats (such as .docx, .pdf, .of, or .rtf) and keep editing it on other platforms.
Auto-save
Forget about losing documents because the power went off, or your computer shut down by no motive. Every time you finish writing something in your document, Google Docs automatically saves it. So if you are a forgetful person and never hit the Save button, this is a perfect setting for you. In fact, because of this auto-save feature, there isn't a save button anywhere in the interface. So it is a lifesaver, right?
Collaboration in real-time
As Drag is a collaborative tool, we also love that Google Docs has the same purpose. This is a great feature for teams that need to collaborate on documents. In addition, Google Docs allows you to share just documents, while with Google Drive, you can share whole folders containing documents. There are three collaboration features inside Docs, useful to teams: sharing, commenting, and editing in real-time. Sharing With a regular Word editor, you have to send a copy of the document to the person (or people) to have a look and edit too. This ends up creating a lot of versions of the file, which is something that leads to time loss. Nonetheless, with Google Docs, you have two important elements while sharing documents: security and easy control. To share a document, access the tab File, then Share. Then, you can either type the email addresses or click on Get Shareable Link. This increases security because you can certainly know that only the people you are inserting or sending the link to will access the document. 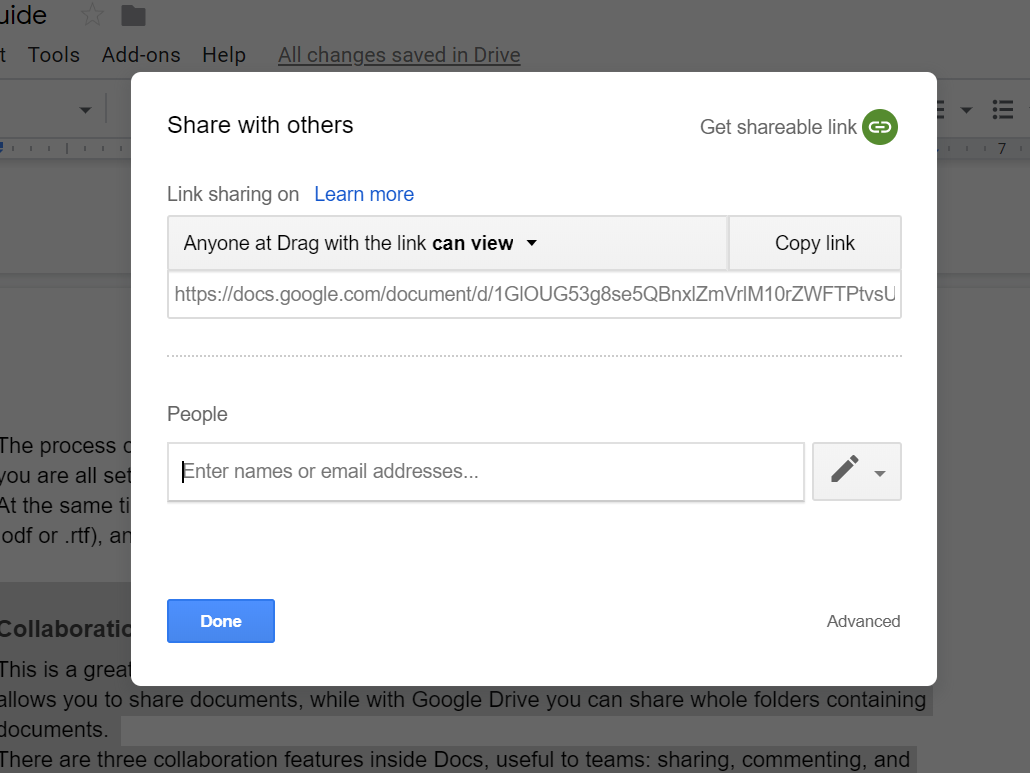 In this same popup, it is also possible to choose what kind of privileges you are going to give to these people:
-
View: People can only visualize the document in real-time. However, it is not possible to type, download, copy, print, exclude, or any other action along with Google Docs.
-
Comment: This allows the person to add comments to the document. Commonly useful for reviews and documents that need to be pre-approved.
-
Edit: The editors have full control of the document, and all the options are enabled for them. It's ideal for teams that are writing together.
Besides, you can click on Advanced to set other relevant options such as Prevent editors from changing access. This will enable you to send the document to other people you don't want access to. The advanced window is also possible to manage all the accesses, mainly to exclude the ones you want to stop sharing with.
Editing
Editing in real-time is a collaboration tool that saves time and reworks. As Google Docs is online, it was possible to add this amazing feature, salvation for many teams. By the way, 50 is the maximum number of users that can edit the same document simultaneously. So if you are part of a big team, it will certainly work for you. Maybe you might think that lots of people editing something at the same time can turn messy, right? So the chatting tool and the comments are important for communication and avoiding mistakes while collaborating on that document.
Commenting
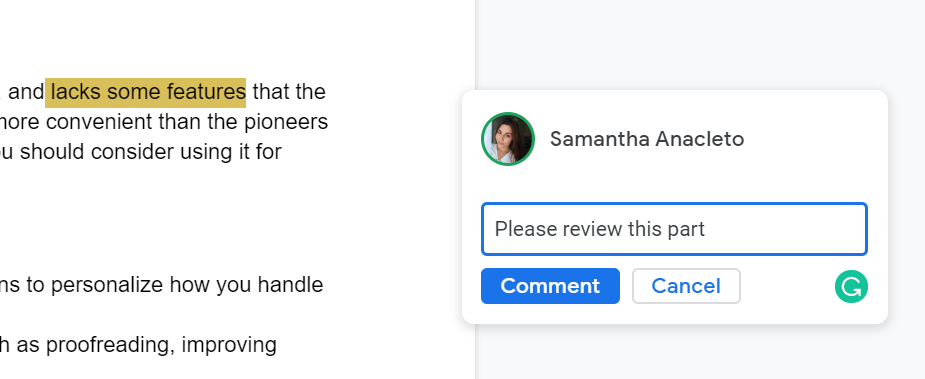 Another important aspect of collaboration was made possible inside Google Docs: comments. While working in a team, it is always necessary to point out some improvements, suggestions, etc. Adding notes and comments are the most used ways of doing that. In Gmail, you can do that by selecting a portion of the text, and then clicking on add comment. Note that only people who have access to this document can make notes to make notes. All the comment boxes stay available on the right-side panel, and users can reply them to. You can also mention someone in the team by typing @ and the email or name of the person. After doing the action that the user requested, click on Resolve, then the comment will disappear.
A new document on Google Docs from scratch
Now that you know why Google Docs is a great word processor, take the time to learn how to manage this tool by creating documents from scratch.
Step 1: Creating docs
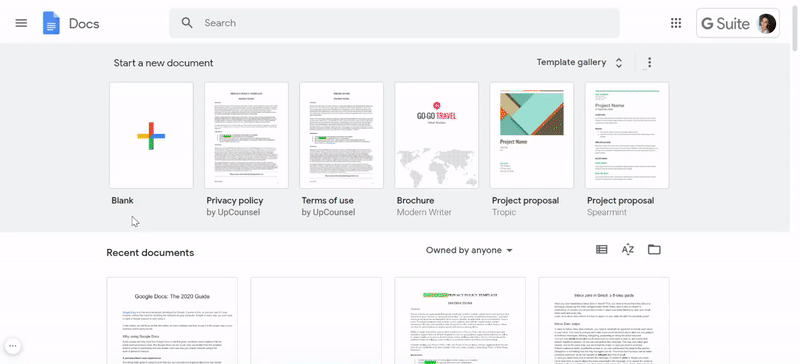 First of all, you need to access the Google Docs homepage https://docs.google.com/document/. Then you can choose between two options: the plus symbol with a blank document or a template. After that, a new document will automatically open. As a default, its name will be Untitled Document, which you will be able to change by clicking on the Title box. Another way of doing that is just typing the title on the page and clicking on the Title box.
Step 2: Formatting
Google Docs toolbar is pretty similar to other word processors. You are going to use it to change things in your text, such as:
- The font type and size
- Text alignment
- Italic, Bold, and Underline
- Text and Highlight Color
- The text styles (e.g., Title, Subtitle, Headings)
- Spacings
- Lists
- And also, Clear Formatting
Step 3: Inserting images
There are two paths for inserting images. The simplest one is clicking on the symbol of a picture (represented by a square with a mountain) on the toolbar. The second one is going to the top menu and selecting the tab Insert. Then hover on the Image option and choose the source from where you are uploading an image. Google Docs allows you to upload .gif, .jpg or .png. Images that at the same time have less than 50 MB.
Step 4: Table of contents
 You can also insert a table of contents in your document. You can do that by going to the tab Insert on the top menu. Next, hover the mouse over the option Table, and you will see a lot of mini squares. These squares represent the number of columns and rows your table will have. After deciding your table size, select the configuration and click on it. The table will appear on the document instantaneously. To edit your table, click on the right button of your mouse inside a row. You will be able to do actions such as adding and deleting columns or rows.
Step 5: Sharing your document
After finishing your document edition, it is time to share it. There are four ways of doing that from Google Docs. First, click on File at the top menu, then choose one of these alternatives:
- Share: You can input the email addresses of the people you want to share the document with. Or copy the link to share through other channels.
- Download: Download your document to your computer. You can choose between some file formats such as .pdf, .docx, .rtf, .odt, .txt and others.
- Email as an attachment: You can directly send your document via email. A popup will open, and you will be able to set the attachment format, the recipient's email, the subject, and the message.
- Publish to the web: If you want to share your document on your website or blog, you can use this option. Again, it's possible to choose between link and embed.
Google Docs Tips and Tricks
To enhance your experience with Google Docs, we have prepared some tips and tricks to make your life much easier while using this tool.
Adding comments
To add a comment, first select the part of the text you want to comment about. After, click on the symbol of a dialogue box with a plus on the toolbar. The second way you can insert a comment is by clicking with the right button of the mousepad over the selected text and then on Comment. But the easiest way is using the keyboard command Ctrl+Alt+M.
Voice Typing
This tool is helpful when you need to speed things up with your texting. You can type and edit with your voice, and all you need is a microphone on your computer. It's possible even to dictate punctuation, such as periods, commas, and exclamation points. Suppose you make any mistake while voice typing. You can move the cursor to the wrong part and correct it without turning the mic off. To start voice typing on Google Docs, click on Tools, choose Voice typing, or press the keyboard command Ctrl+Shift+S. After that, a box with a microphone symbol will appear, so click on it to start speaking. You can choose between multiple languages to start using this tool. Then, click on the drop-down list above the microphone. Click on the microphone when you are ready, then start speaking. Remember to always speak clearly, with pace and adequate volume. Just click on the microphone again when you want to stop speaking. One last thing, be aware that this feature will only work in a Chrome browser.
Using templates
Google Docs offers many document templates that you can use to save time and effort if you don't want to start with the standard blank page. There are lots of templates that you can choose from, including, for instance, Newsletters, Job Offer Letters, Resumes, Essays, and Reports. They are all editable, and you can customize them according to your needs.
Creating your own Google Docs templates
Creating your template is simple. You need to follow some steps:
- First of all, create a document and edit it the way you want, adding visual elements, the default format, etc.
- Second, go to Google Docs home page, click on Template Gallery, then choose the option Submit a template.
- Choose from your Google Docs and then select the template you have created.
- You must write a brief description of the template because Google might not approve your template if you don't.
- After you choose a category: Business or Legal, the last one is for legal contracts.
- The next step is to select the template language.
- Click on Submit Template to finish the process.
When you need to use the template you have created again, go to the template gallery, select it, and start editing.
Version History
Sometimes you make mistakes while editing a text, and reversing them is easy with other word processors. But have you ever tried clicking on undoing so many times to correct a mistake you have made? Unfortunately, this tool is limited, and many times you can't go back to the desired point. With Google Docs, you have the Version History, where you can see everything that was changed and restore these other versions.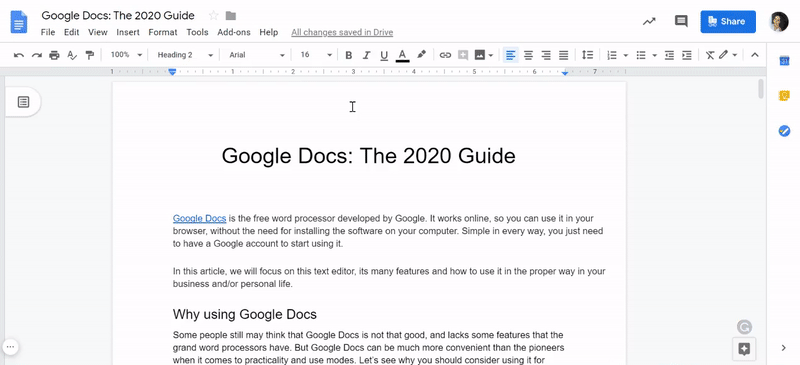 To access this tab, go to the page's top and click on All changes saved in Drive. You will find a complete activity log with the user names, times, and dates of modification. In addition, parts of the text that were changed will be highlighted. This is also a great opportunity to track what is being done with the document.
Useful add-ons
There are lots of add-ons. Of course, each business will need different kinds of extensions. But we have separated some that all or most of them should have to work together with Google Docs account.
Power Thesaurus
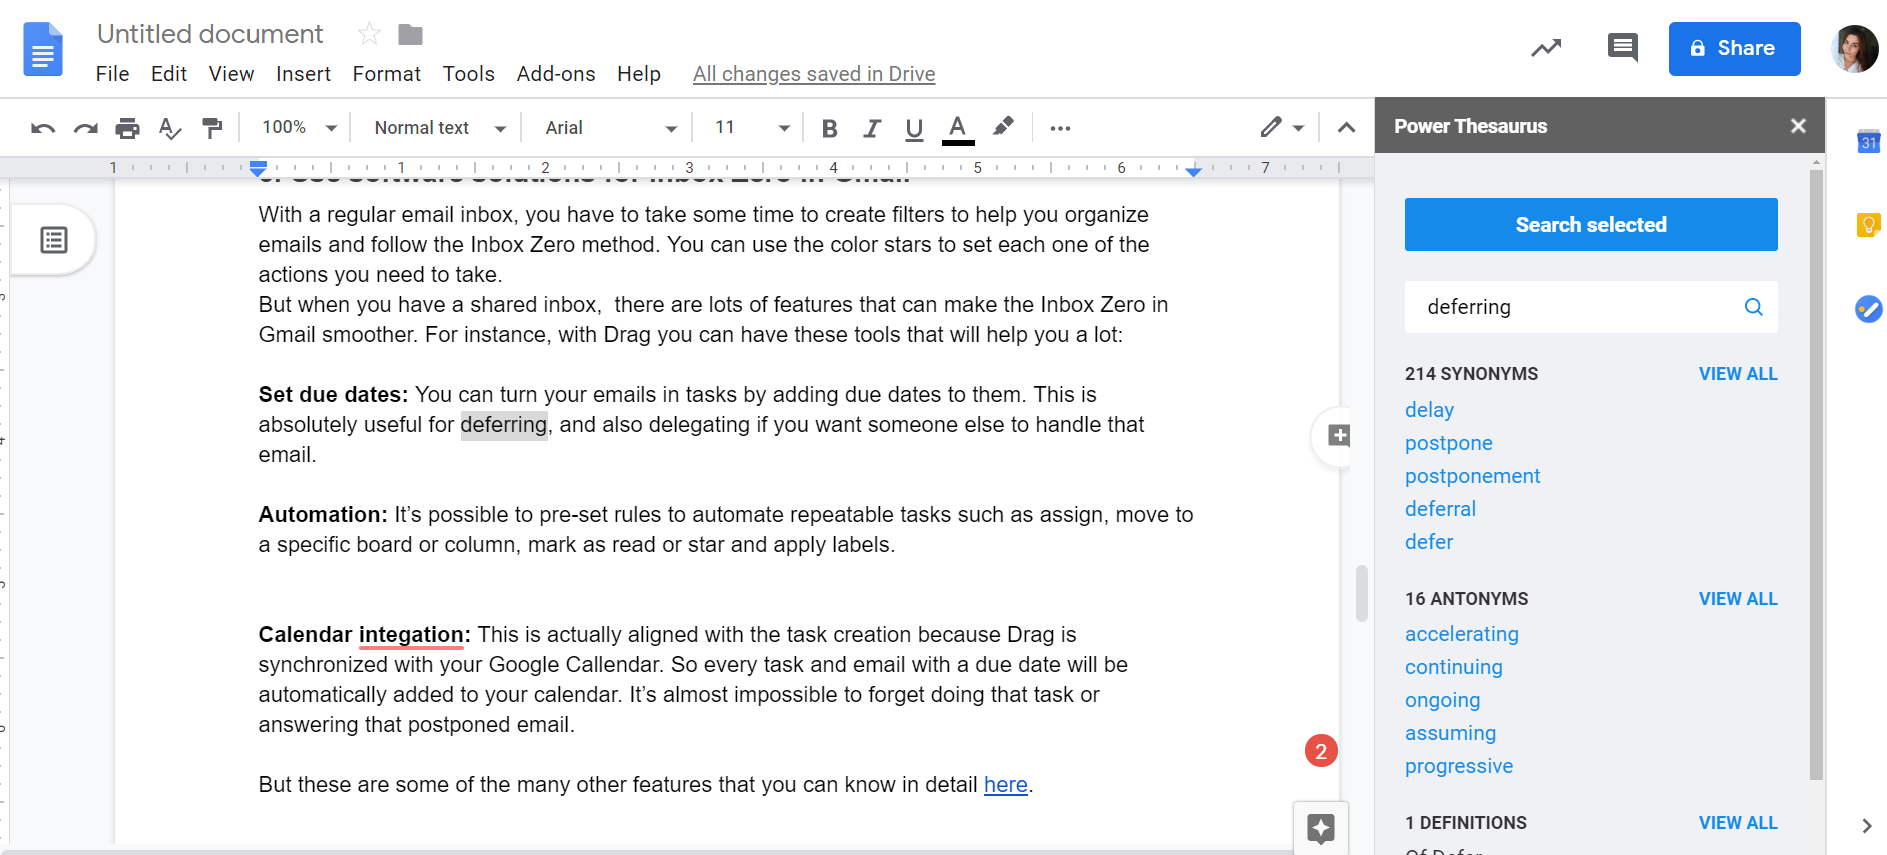 If you have over 70 million synonyms and antonyms available, you will certainly improve the quality of your texts. Power Thesaurus is the add-on that makes it possible, using thesaurus.org as a source for its collection. So every time you forget a word or want to stop using the same old ones, you need to use this quick search. To run it, select the desired word, click on Add-ons on the top left menu, and then hover on Power TheSaurus, choosing Search Selected Term. A popup will appear on the right with all the synonyms, antonyms, and a definition of that word.
Speakd
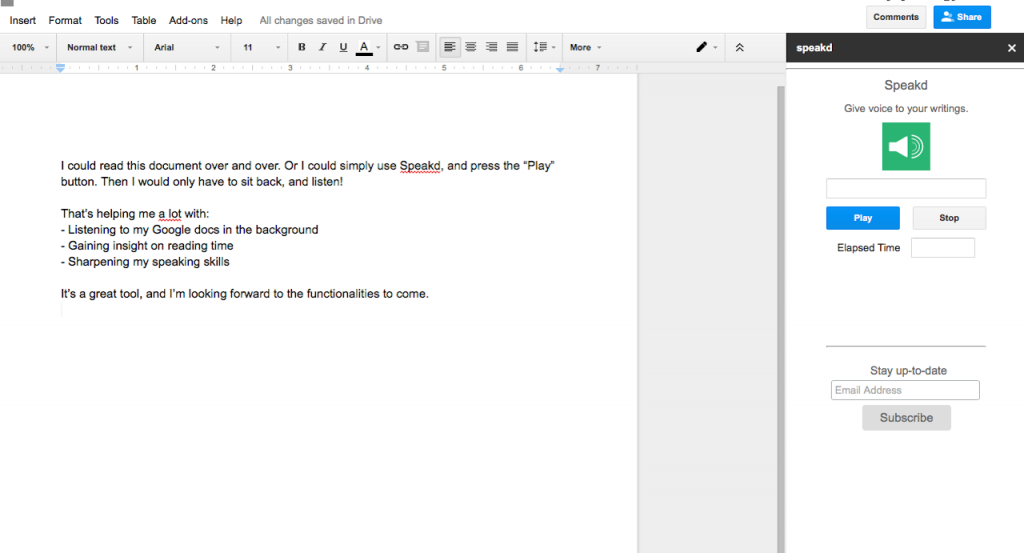 Sometimes you are in a rush, with so many things to deal with at once. Speakd helps you at these times by reading your documents for you. You can listen to your text, identify how it sounds, searching for mistakes or phrases that don't work well. With Speakd you can also estimate the reading time for all your texts, which helps focus on your initial purposes.
DocSec
 Imagine you need to keep some parts of your document protected because it's a confidential matter. This is possible with DocSec, an app that allows you to set password protection in certain texts on the document. After applying the password, only you and whoever you shared the password with will access and edit these confidential parts. First, click on Add-ons and select DocSec. Then a side panel will appear, and you need to enter the password you desire. Next, insert a secret text that will replace the part of the text you want to protect. Next, select the part of the text you want to hide, then click on Censor Text. At last, you can share your password with other people, but they will only be able to access the hidden parts after installing Doc Secrets.
Text Cleaner
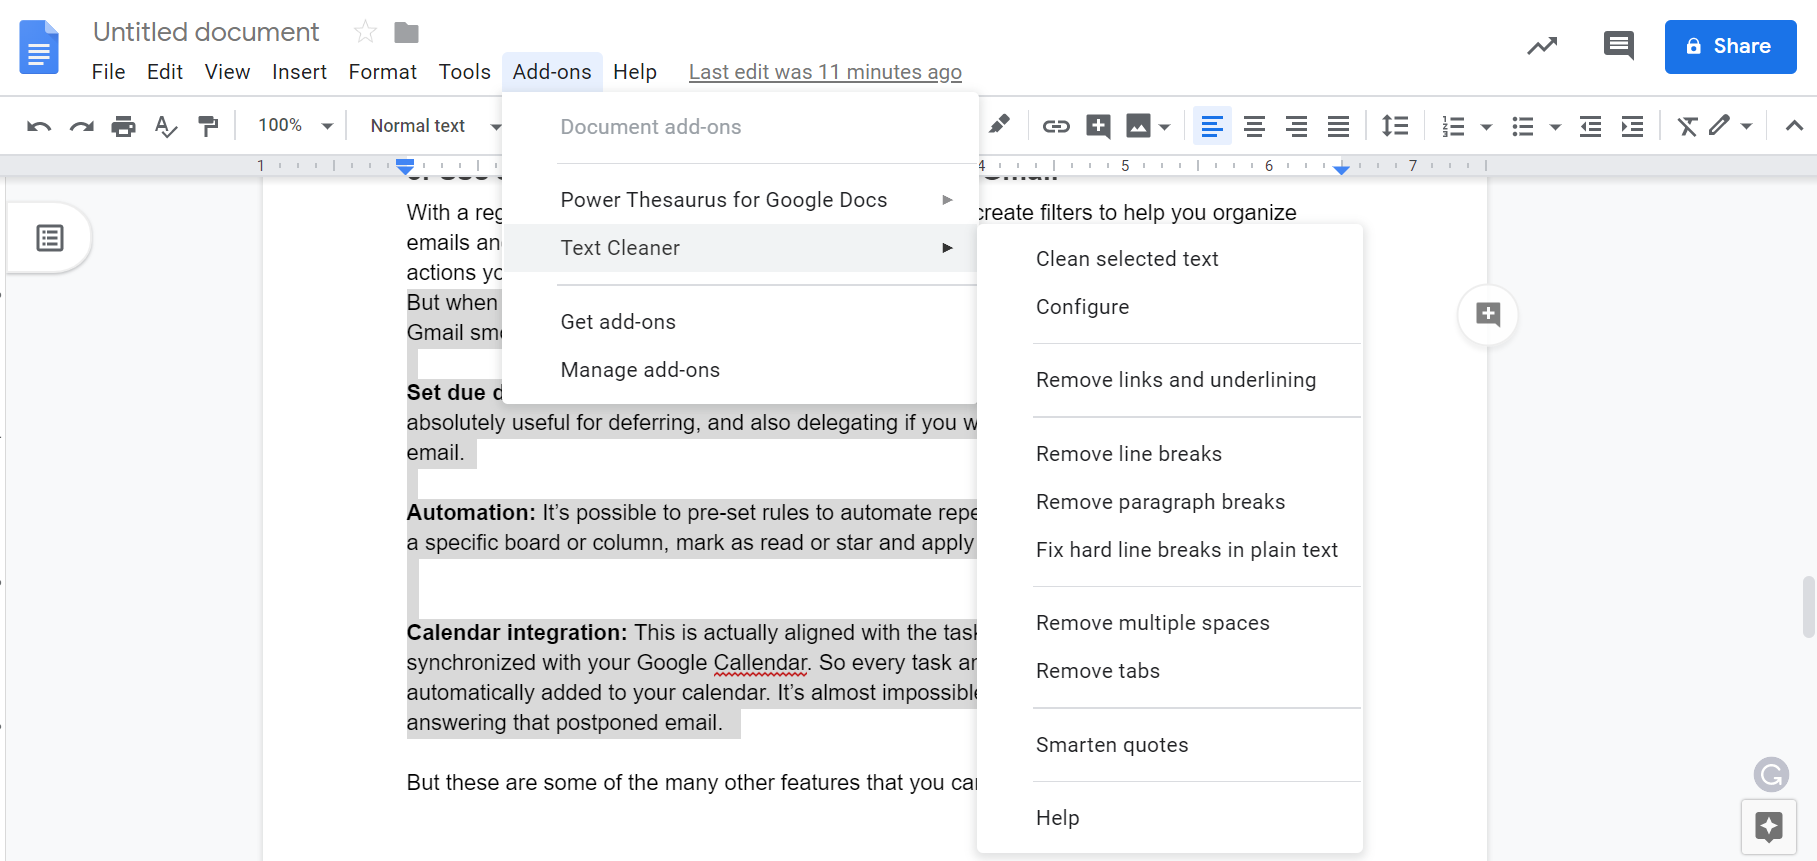
Sometimes you need to remove the text formatting, and despite the option that already exists in Google Docs, some tools can help you in an advanced way. Text Cleaner can preserve italics and bold while you remove formatting, which is good so you don't have the work of formatting the text twice. In addition, you can remove line breaks, multiple spaces, and whatever aspect of a copied text you paste into your document.
Grammarly
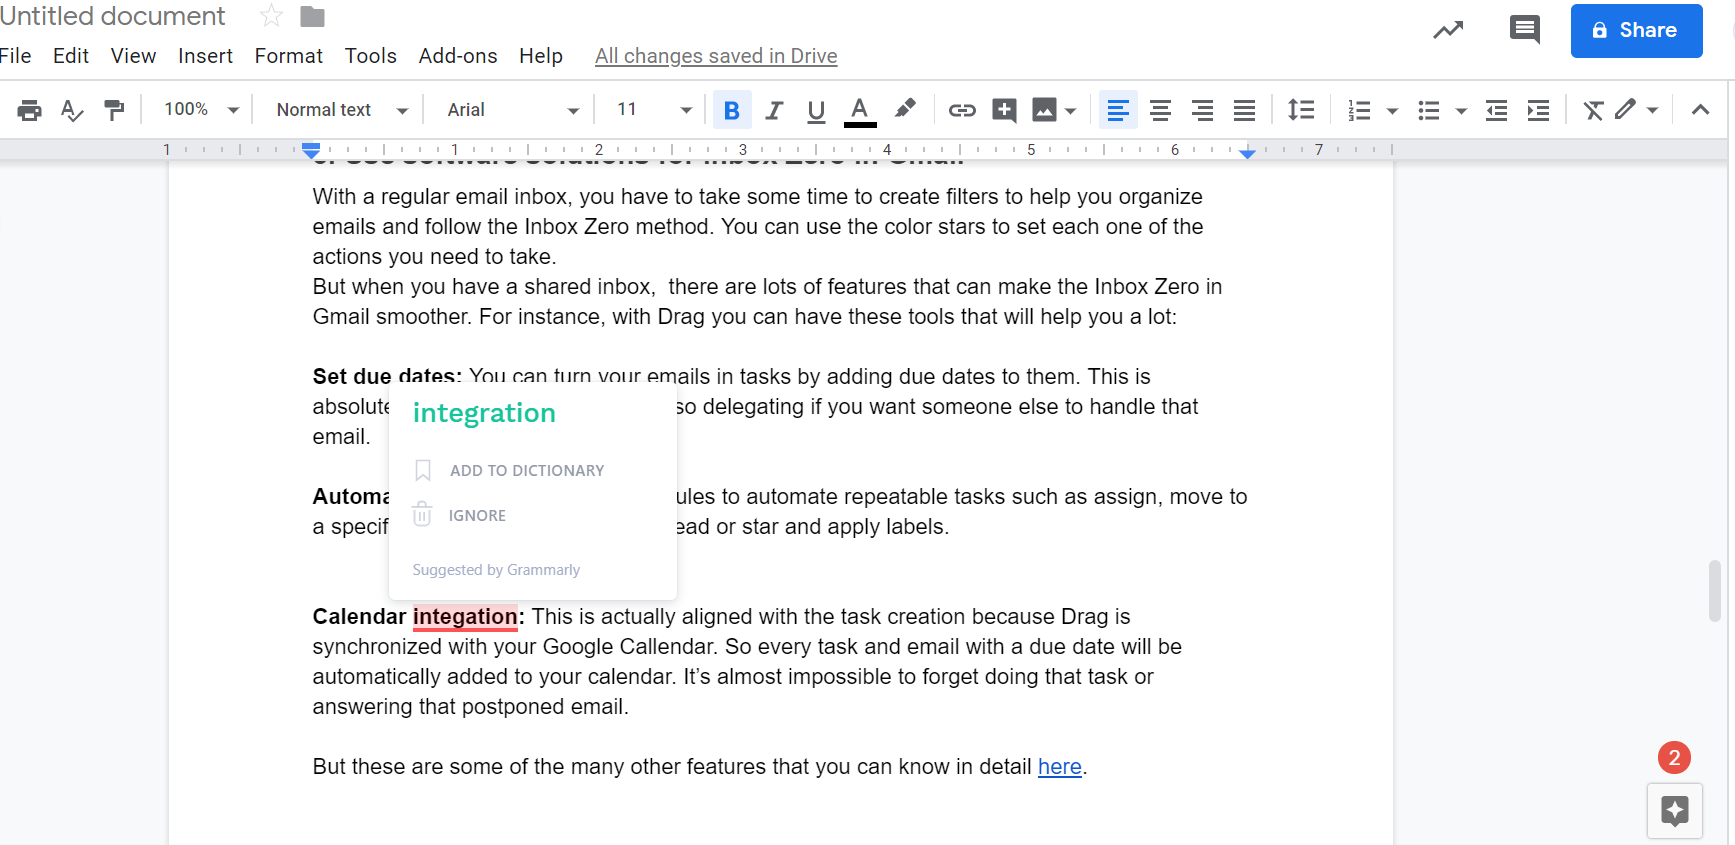 This isn't exactly an add-on, but a Google Chrome extension that works inside Docs. It's a handy tool for proofreading any text. It suggests grammar corrections, enhances your vocabulary and keeps your text concise. You need to install it, and it starts to work without any effort. First, it underlines the mistakes with red, and when you hover the cursor on them, a suggestion box appears. The next step is to click on the box, and Grammarly will correct the text.
Try Drag free. Shared inbox + AI inside Gmail
200,000+ teams use Drag to manage shared emails. 7-day trial, no credit card.
Useful Keyboard Shortcuts for Google Docs
Keyboard shortcuts are ideal for facilitating your daily activities on the internet. It wouldn't be different when it comes to Docs. Spending more time writing than searching for tools enhances your productivity. That is why we separated some shortcuts that will be useful to you.Useful Keyboard ShortcutsWord countCtrl + Shift + cInsert commentCtrl + Alt + mOpen revision historyCtrl + Alt + Shift + hStart voice typingCtrl + Shift + sOpen chat inside the documentShift + EscOpen dictionaryCtrl + Shift + yLeft alignCtrl + Shift + lCenter alignCtrl + Shift + eRight alignCtrl + Shift + rJustifyCtrl + Shift + jCopyCtrl + cCutCtrl + xPasteCtrl + vPaste without formattingCtrl + Shift + vUndoCtrl + zRedoCtrl + Shift + zOpen linkAlt + EnterPrintCtrl + pOpenCtrl + oFindCtrl + fFind and replaceCtrl + h
Google Docs FAQs
How do I create a custom template in Google Docs?
Template Gallery method (for work/school accounts):
- Design your document with the desired formatting.
- Go to File > Template Gallery > Submit template.
- Select your file, add a description/category, and submit.
Private method (personal accounts):
- Design your document.
- In Google Drive, right-click the file and select Make a copy for reuse.
What are Google Docs formatting best practices?
Use Styles:
- Apply Title, Heading 1, Heading 2, and Normal text styles for consistency.
Simplify fonts:
- Stick to 1–2 fonts (e.g., Arial/Georgia) and use bold/italics sparingly.
Optimize spacing:
- Adjust line spacing (1.15–1.5) and margins via File > Page Setup.
Structure with tools:
- Insert automatic Table of Contents for long docs.
- Use bulleted/numbered lists for readability.
Conclusion
We hope this complete Google Docs Guide has helped enhance your user experience with it or made you eager to start using it the best way possible. This word processor can make your life easier in so many aspects that you really should give it a try. And if you are a Google Docs user already, how about testing the features you haven't used yet, or improving the workflow inside it with some Keyboard shortcuts?
Switching browser tabs and tools all day is killing your work
It's not just the time spent switching between tabs, whenever you interrupt something your brain keeps giving attention to the interrupted activity. this adds up throughout the day. To help you assess the time you lose on the platform overload we've made a calculator.
Nick Timms
Co-founder